


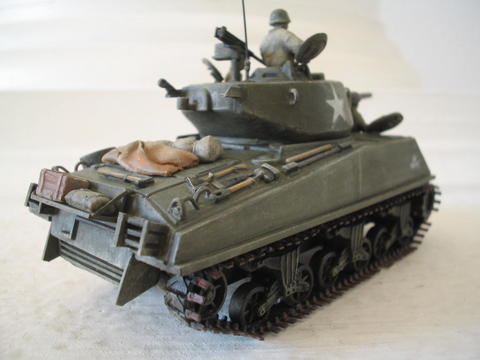


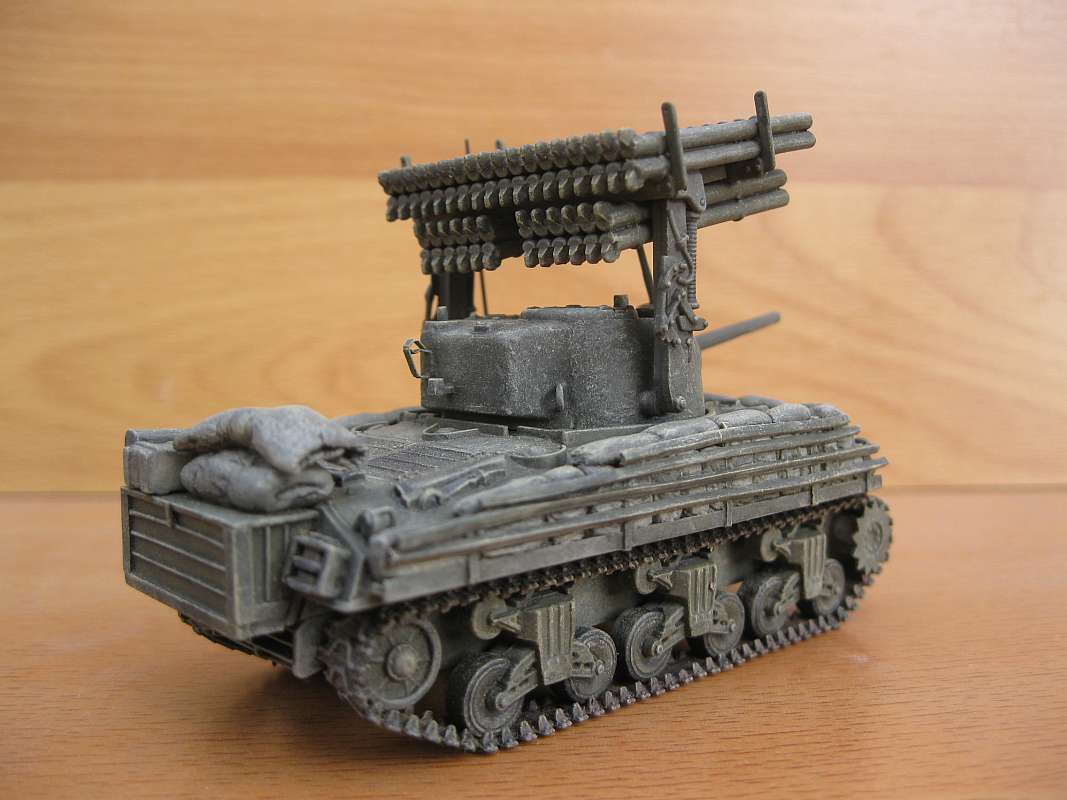
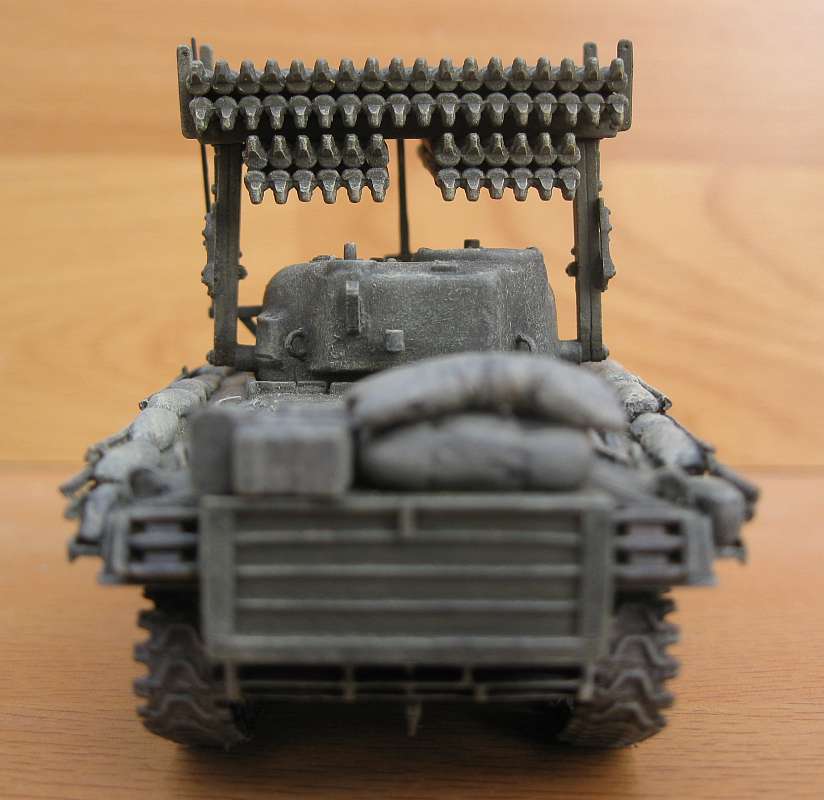


One day I found the new Airfix 'Calliope' and I decided to give it a try. The price is less. I did not like the ESCI and the UM 'Calliope'. The T34 is definitely the best of the three because it has many parts, although many parts did not fit well initially and needed some work to make them fit together tightly. The only draw back was that the tubes are molded solid. However, that was easy fix with a drill. The tank is a Trumpeter M4A3. The hull has been replaced with one from Dragon. I made the sand bag re-enforcement from two-part epoxy putty. The angle iron is scratch-built because Evergreen does not have anything that small. The stowage box is of course scratch-built. The tarp is made from hard plastic putty. Enjoy the pictures! ---- Albert.


Sherman 'Crab' mine clearing vehicle
The pictures show the Sherman 'Crab'. The tank is Dragon M4A4 (Mk V). The 'Crab' Mk I is scratch-built with some parts from the Airfix crab. The tank commander figure is from the Hasegawa 'Churchill' kit.


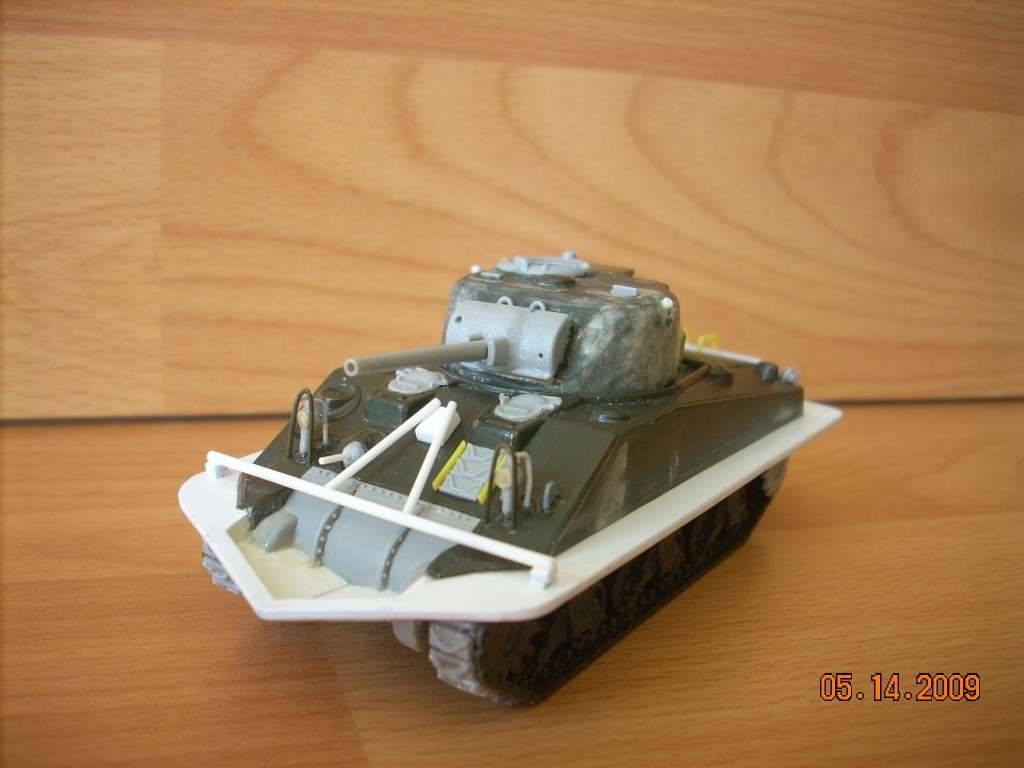


Sherman 'DD' amphibious tank
This M4A2 is based on the new Hat Armorfast with many parts, mostly Dragon. The screen is made with two-part epoxy putty and the rest is scratch-built with styrene sticks and sheets.

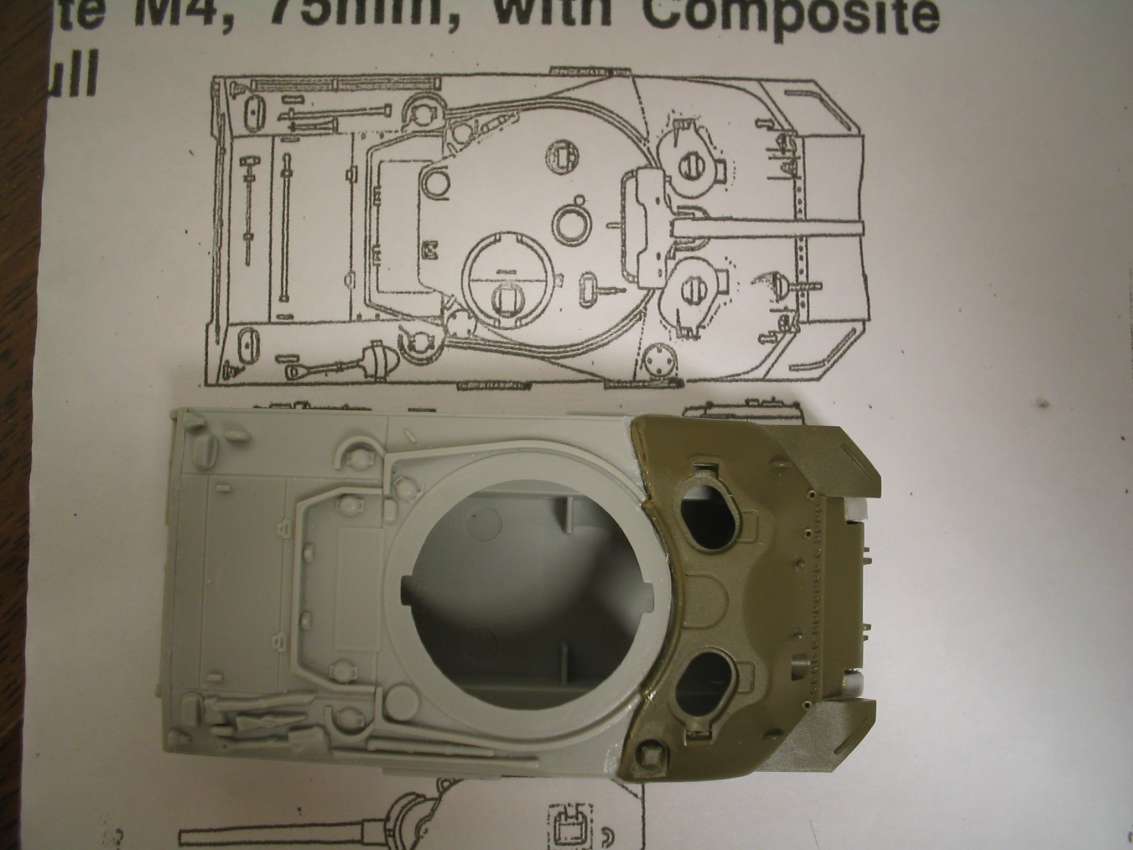


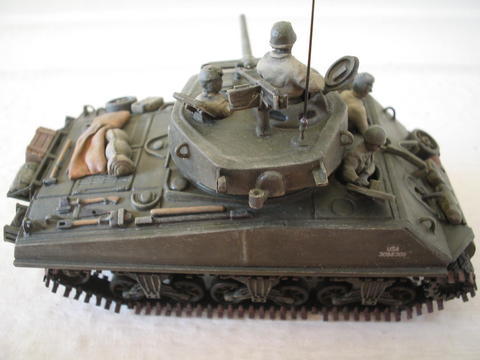
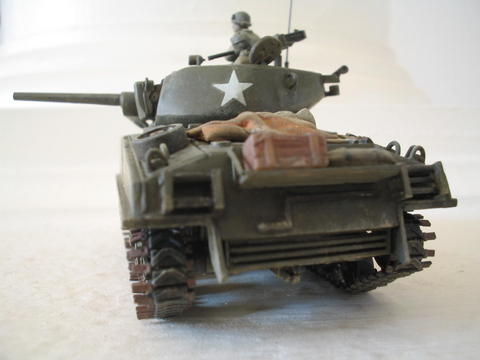
The hybrid hull is made from Italeri (ESCI) M4A1 and Trumpeter M4. A 1/72 scale drawing from Squadron's 'Sherman in Action' has been used. The sharp nose transmission cover from Italeri had to be carved to fit on the Trumpeter lower hull.
For the turret, I added the special rectangular loader's hatch and cheek armor. The 17 pd gun and mantlet are from Hat.
After the initial conversion, this model has been on my bench with base coat of olive drab waiting for my decision on the markings. In 2011, I bought Dragon's M4A4 with tulip rocket. Then I saw the pictures in Dennis Oliver's book 'British Shermans'. This finally brought me to the finishing of this model. - A.Chen


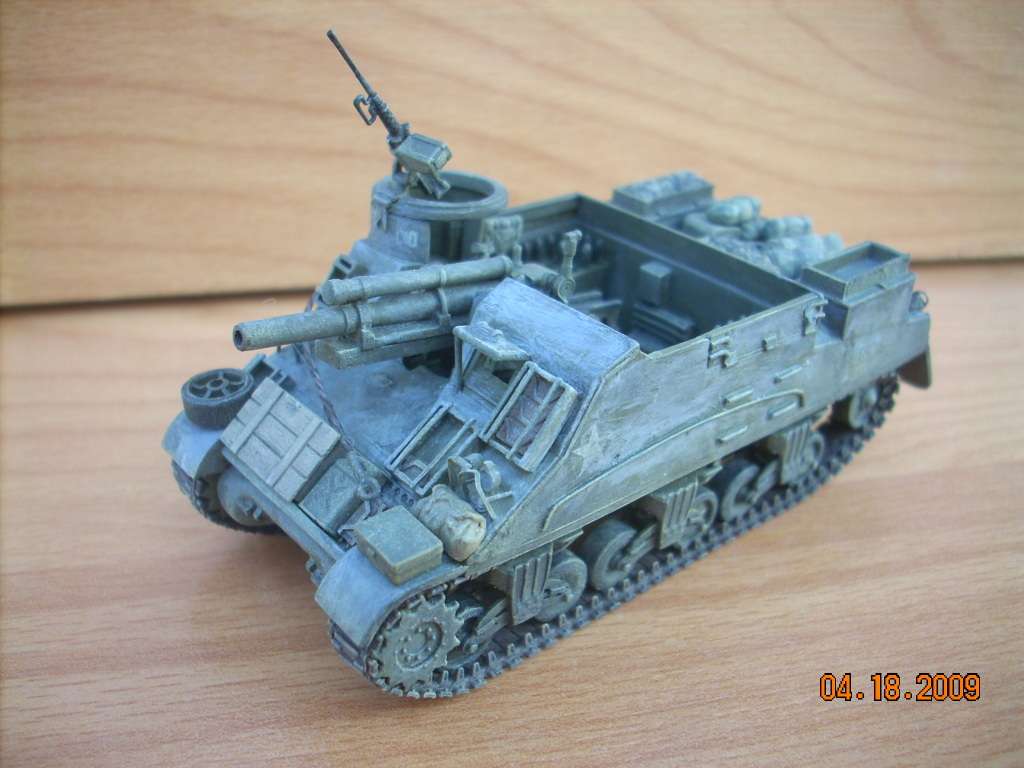


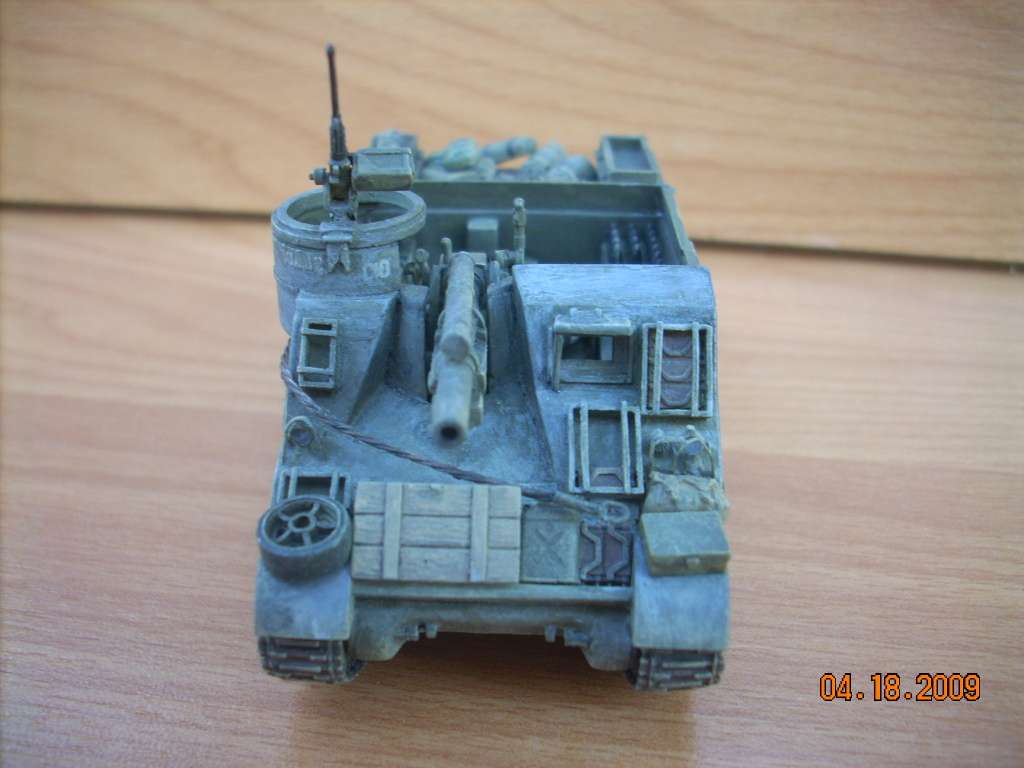


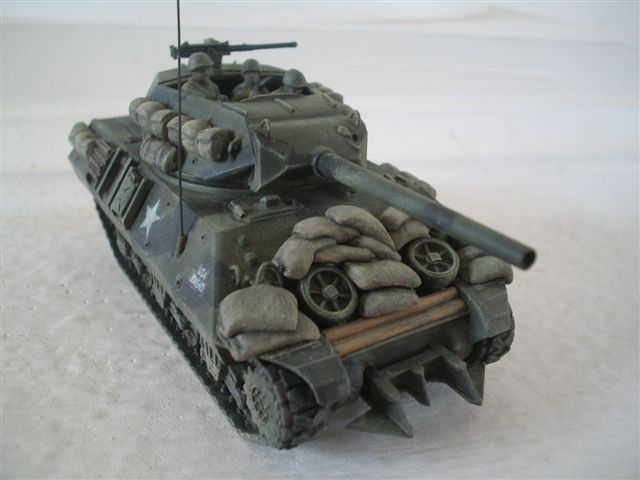
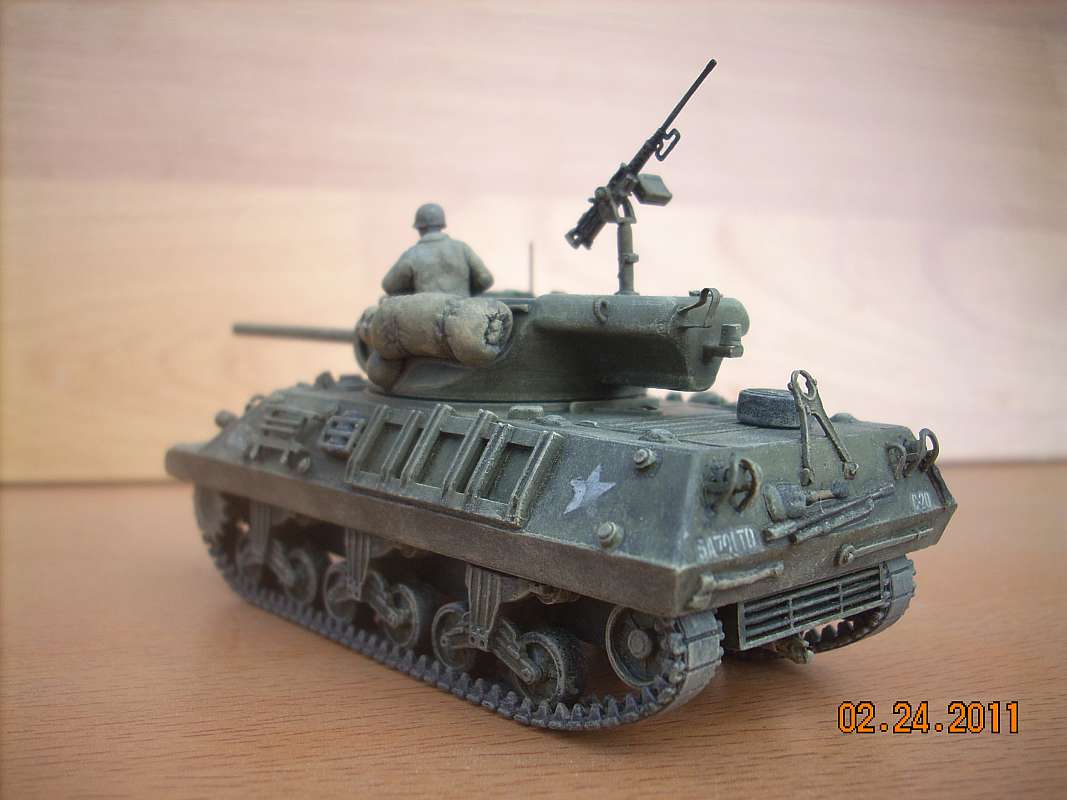
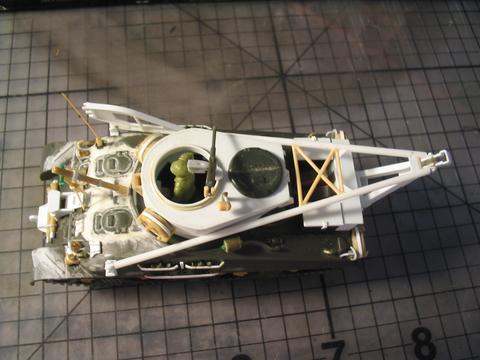
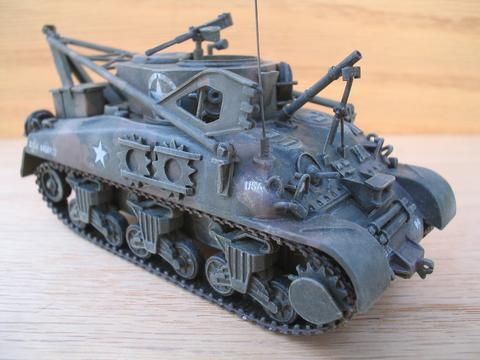
This is only my second US SP gun, the first one being a M10). I don't think there is a model kit of this vehicle in any scale. Most people mistake the late M7 for M7B1. A late M7 has many features similar to M7B1 (light placement, spare track boxed, one piece transmission cover, etc), but a true M7B1 must have the M4A3 engine deck and longer tail. Also, another vehicle, the M7B2 can be confusing, however, it has an elevated gun and machine gun pulpit. It was used in Korean war, not WW2.
I started off with taking apart of the very poor Fujimi M7B1. It had a M3 Lee engine deck, so actually a late M7, as opposed to the Matchbox M7, an early one. The front plates were completely inaccurate so I cut them into eight pieces to correct them. At the same time I adjusted the pieces to 1/72. Also the interior was inaccurate, so I scratch-built the gun cradle with 'I' beam. The machine gun pulpit needs to reworked. I think the raised MG mount was probably a postwar modification so I filed it down. The side armor plates were used with minor modification.
The original gun was small so I replaced it with the over-engineered ACE gun. The result turned out to be a very accurate model but it was very difficult to build.
Since I always like my howitzers short and stubby, I replaced the barrel with a thicker styrene tube. The shields for the gun had to be scratch-built from curved parts (Hat Sherman fenders). Fortunately, the gun fitted into the cradle snuggly with a little room for elevation.
The donor for the rest of the tank was an Eduard M4A3. Since I think the running gear is over-engineered, I replaced it with Trumpeter and Dragon parts. The instrument plate and the driver's seat were from Eduard also. The tracks are Dragon DS. I think they are too wide. The front fenders were built from the original Fujimi with curved parts from Italeri. The rear ones were from Revell.
I could not find too many reference photos of M7B1 in my books. To my surprise, the old 'D Day to Berlin' has a few. I used those pictures to place my decals. Since this vehicle came out in late 1944 or early 1945, I white washed it for the Battle of the Ardennes, which is my favorite battle.
I hope you enjoy looking at the model as much as I enjoyed building it. It took a long time because I think presbyopia is settling in. Regards, Albert

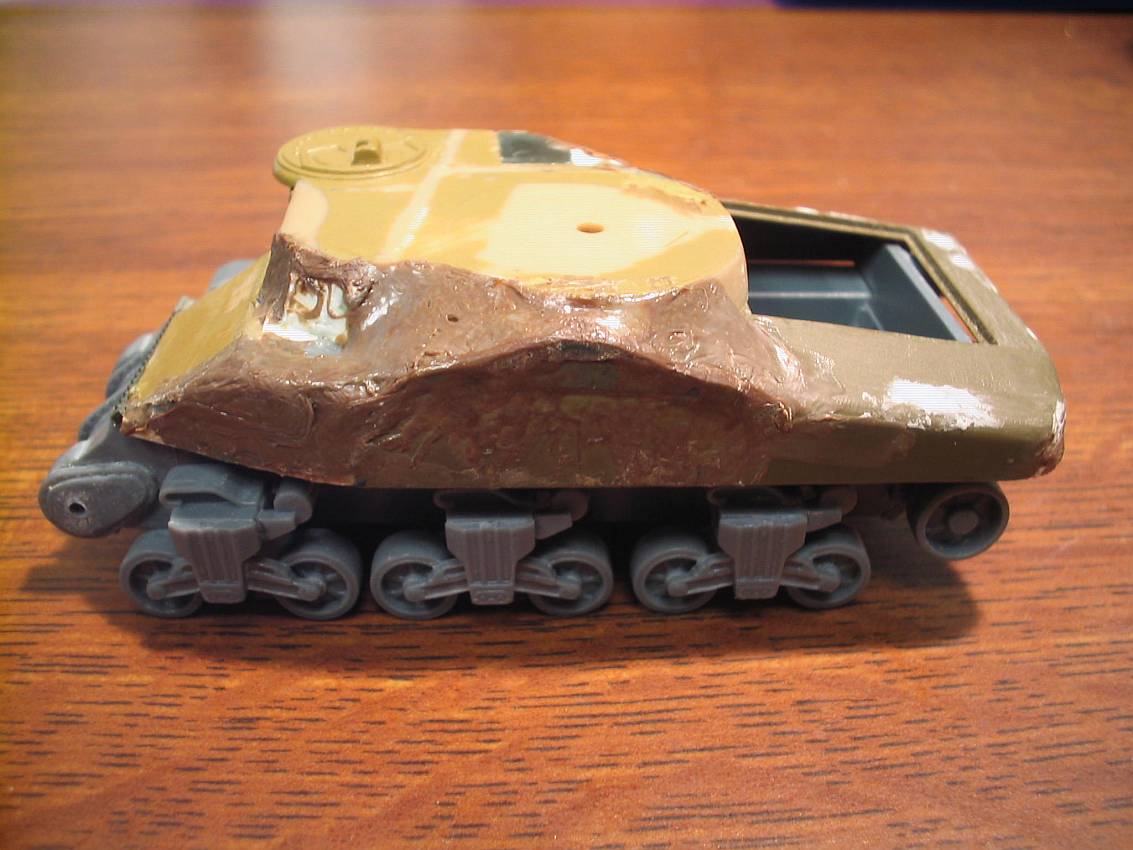


Here are pictures of the Leaflet tank (American version of the CDL) based on a late cast hull M3A1. The model started with the tail of Italeri M4A1 left over from the hybrid firefly project and some old parts of a Hasegawa Grant. I prepared some 'hard plastic putty' by melting sprues in methyethyketone (liquid glue). This was a messy process but I ended up with a cast hull of which the surface has better adhesive properties to glue on details more easily. The lower hull was from Eduard M4A3. I had to modify the rear doors with parts from Italeri. Note the gas cap was cut out from the original Grant hull and re-shaped with streched sprue. The canon was a 75mm PST German gun with its muzzle removed. Scale drawings of the turret show a flat top, but most of the pictures I have seen, show a slope. Other details were scratch-built or parts taken from Hasegawa, Dragon and Mirage.

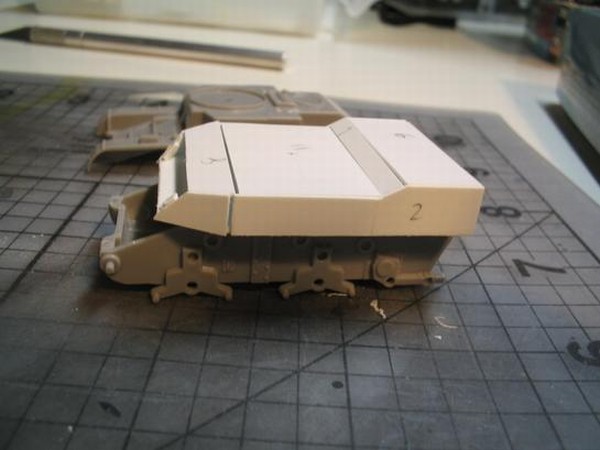
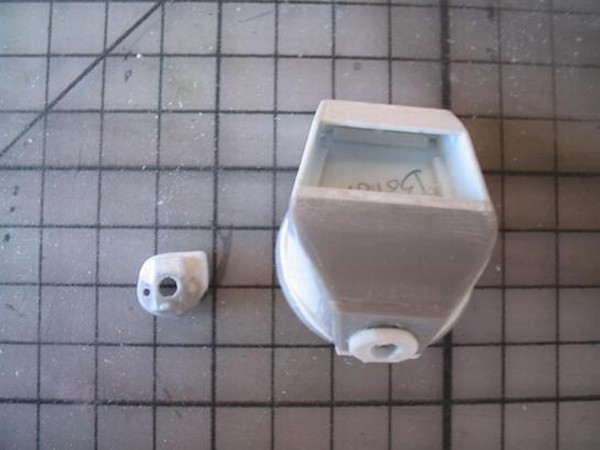


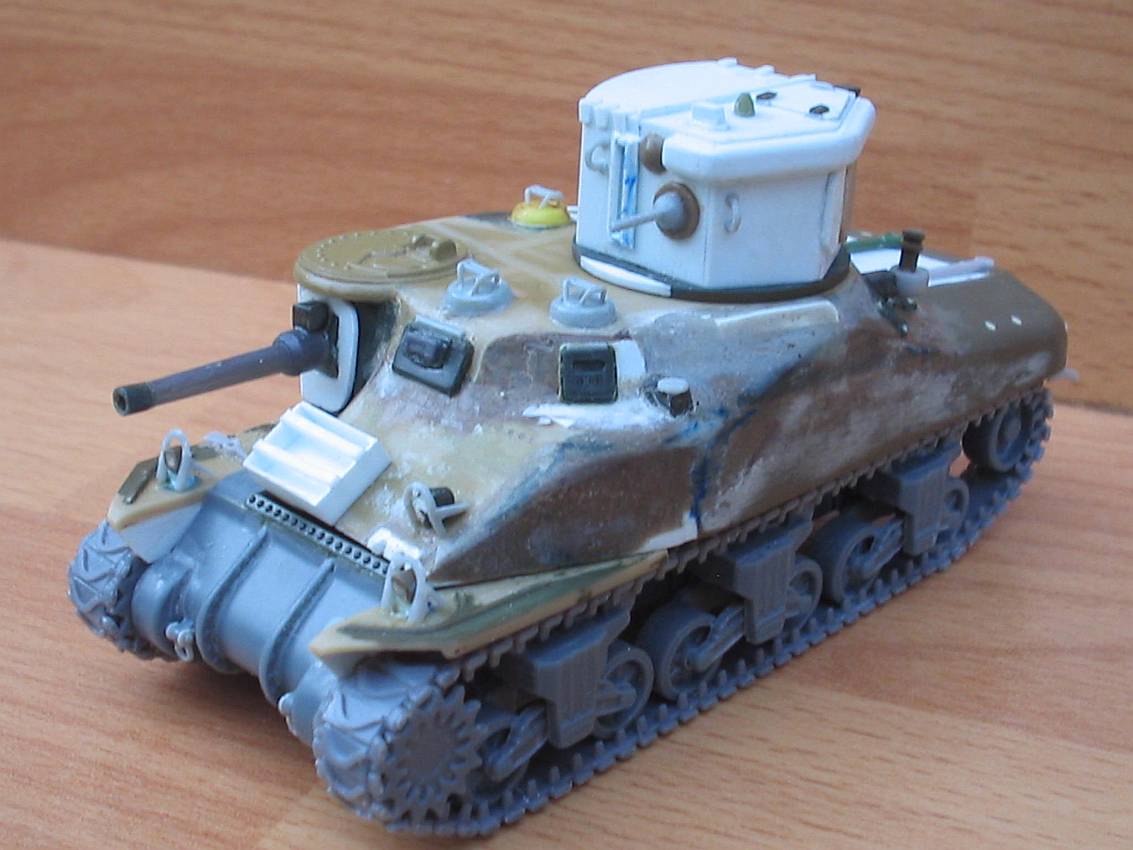
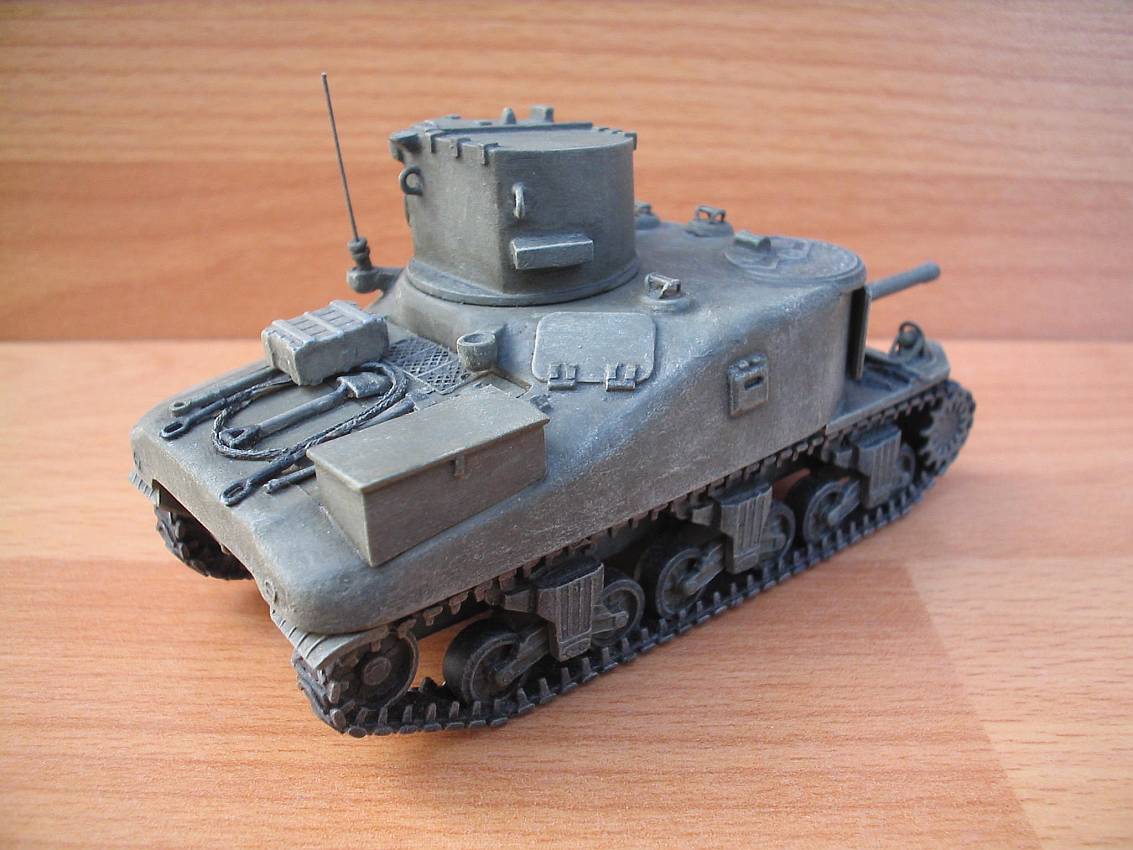
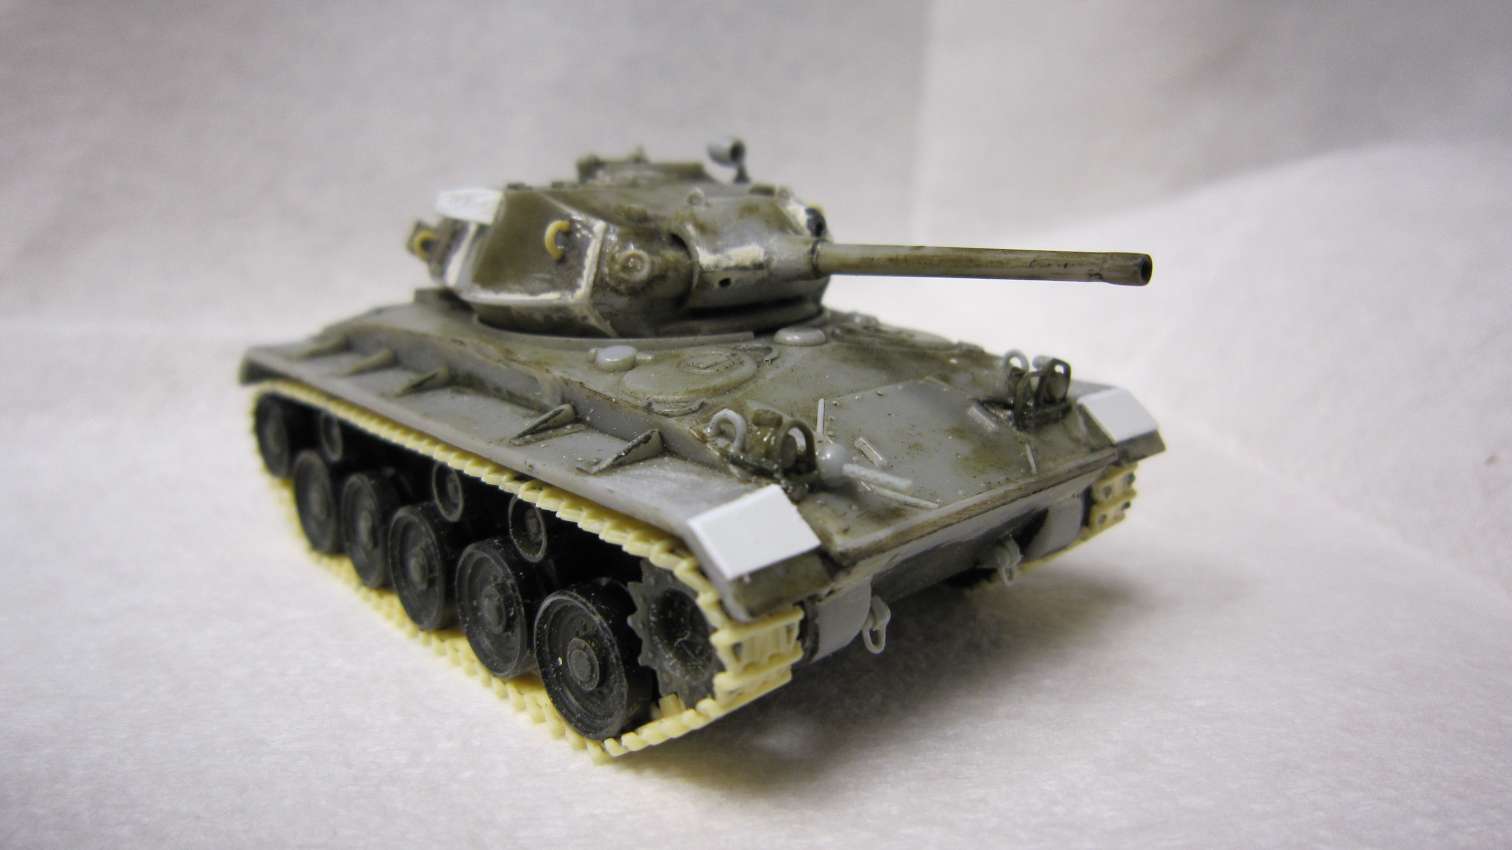
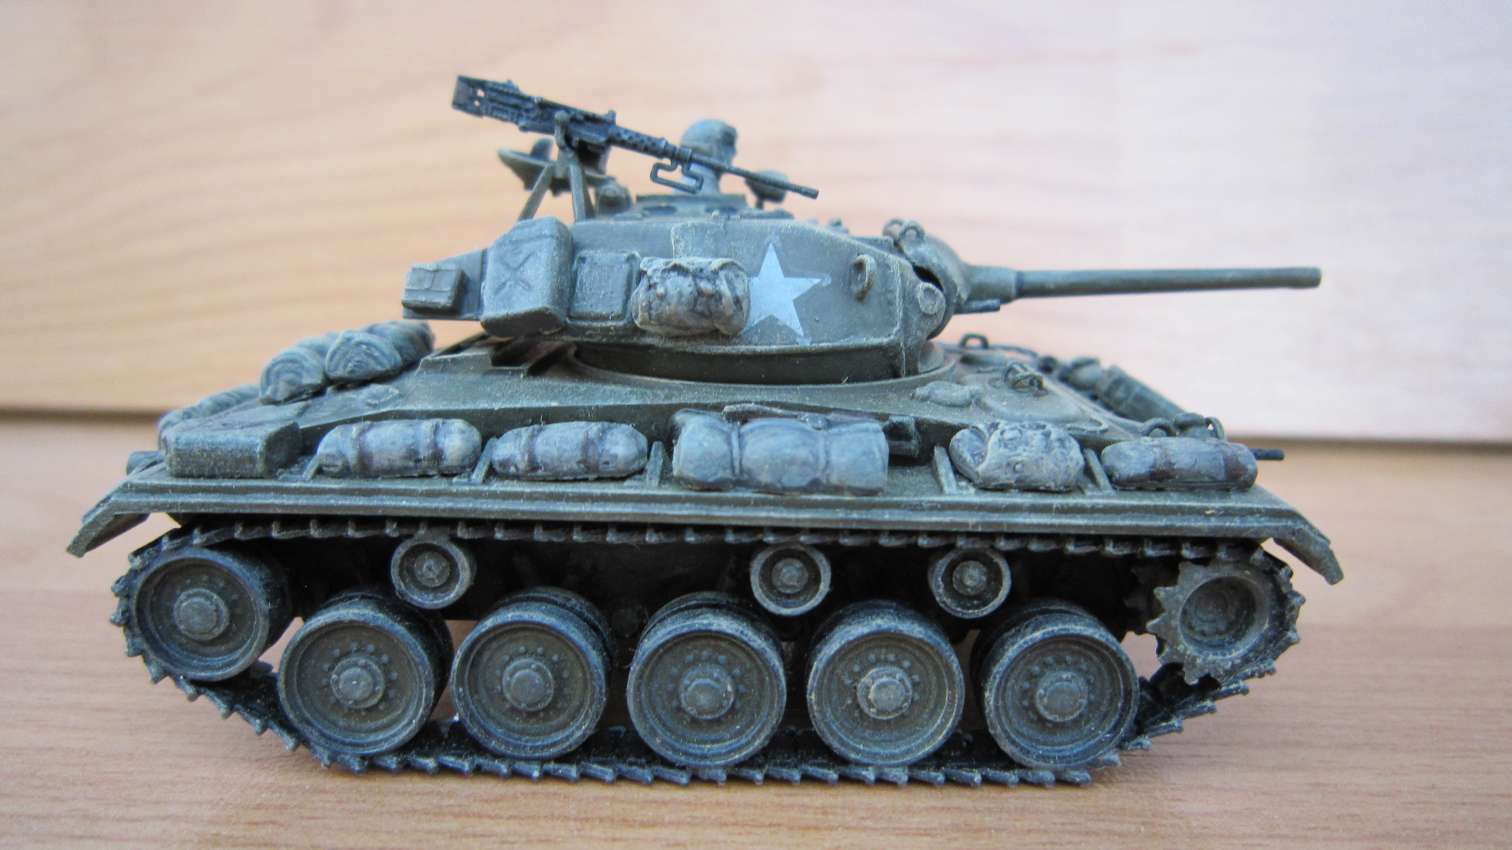
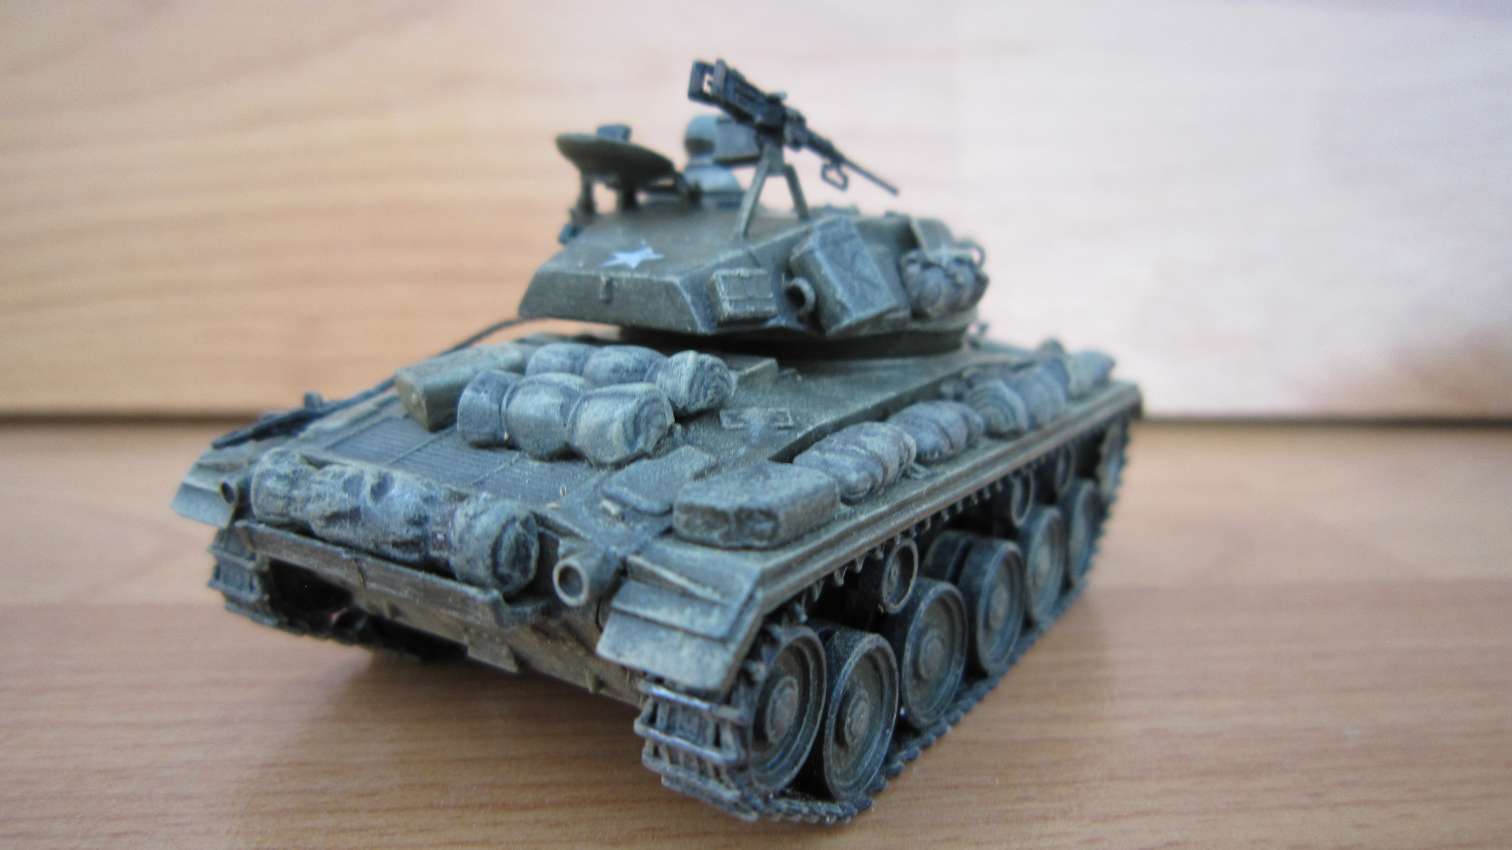
The US M5 - M5A1 light tank
This model is based on the old Hasegawa Stuart. The turret, the upper hull and the rear lower hull are heavily modified and most of the surface details are built from scratch. The most unfortunate part of this model are the tracks. I had no alternative except using the original low quality rubber band tracks. I thined down the wheels and the sprockets to make the weels fit within the tracks.


Dec 2015
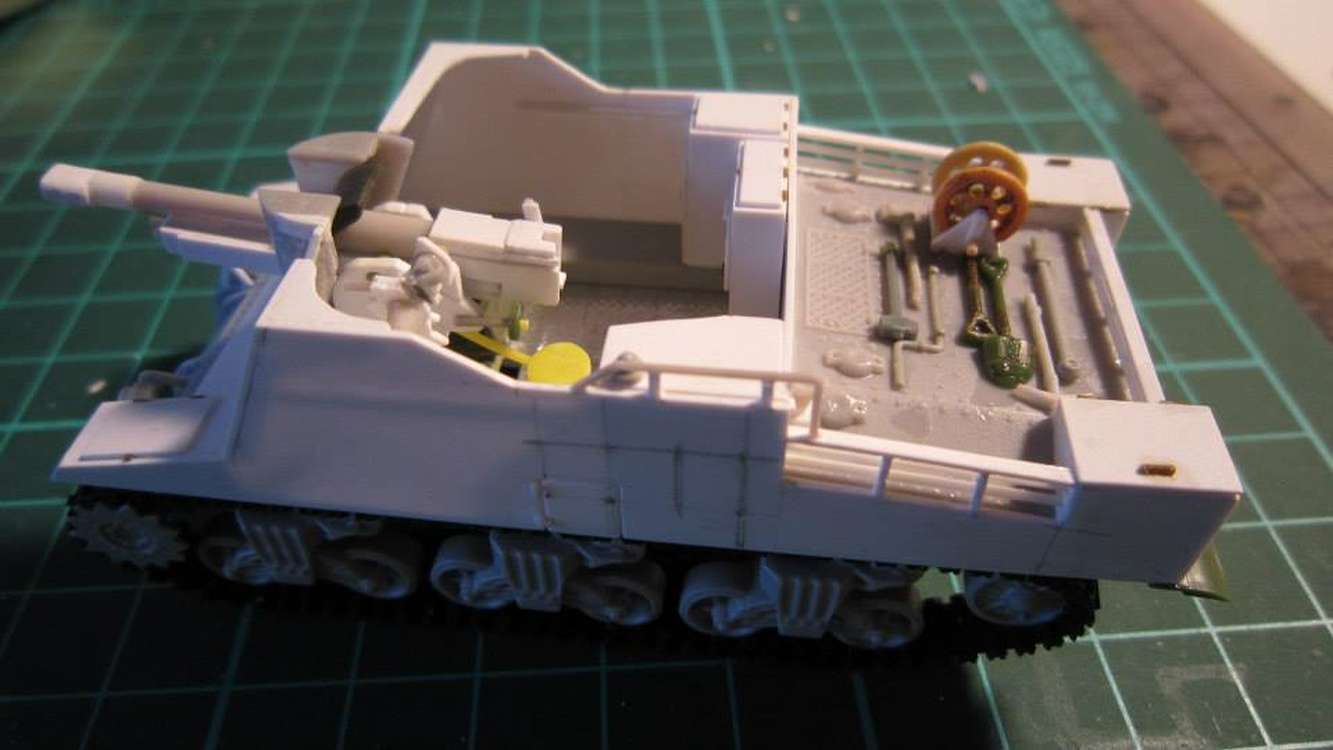
I have been planning this project for over ten years. Finally about nine months ago, I decided to start. Here is a breakdown list of how I
put it together:
- For the running gear, I preferred Trumpeter's fast build for simplicity.
- The new three-piece transmission cover from Heller is excellent.
- For the engine deck, I had to cut out from a Mirage M3.
- For the gun, I attempted to used the ESCI/Italeri 25 pd gun, but it turned out to be over-scaled and not exactly the same. So, I scratch built one based
on Bradford's drawings and many pictures of the real thing or 1/35th scale models from the web.
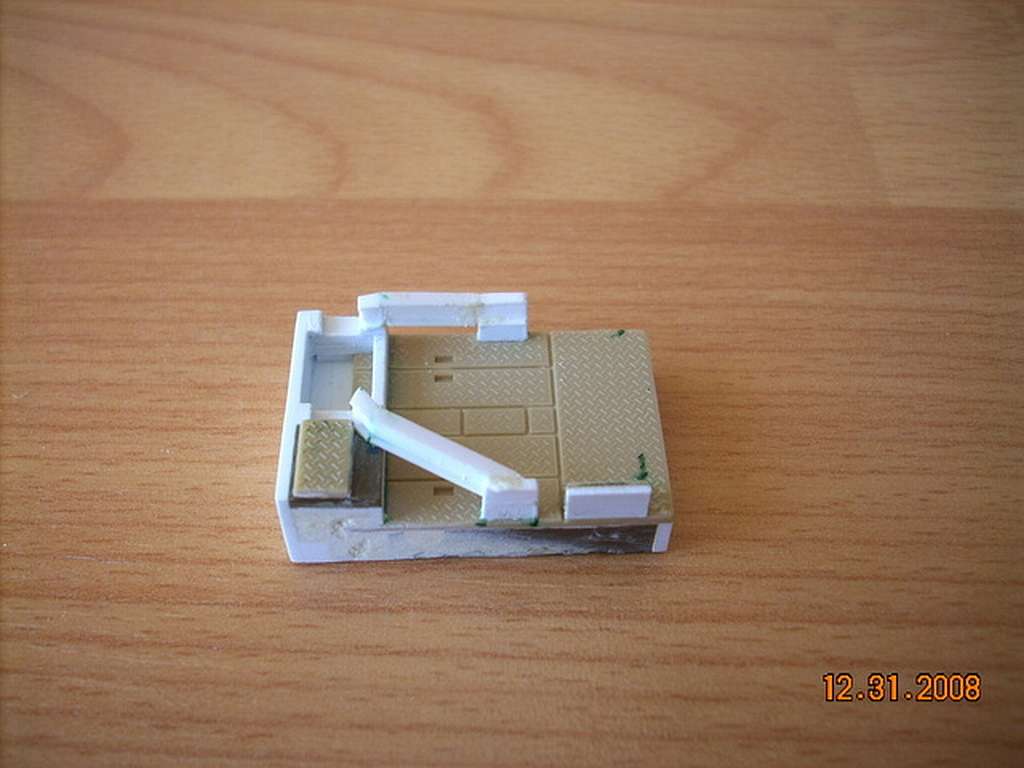
- One of the reason that this has been the most difficult project ever was that it is open top with an interior. The base has a diamond tread plate that is
different from the one in Sherman (ESCI/Italeri M4A1 kit has one). I use the ESCI part as a template and rubbed a sheet of aluminum foil over it to get the
tread pattern.
- The seats, and the instrument panel are parts from the Eduard Sherman. The control sticks are from Fujimi.
- Everything else on the exterior are scratch built.
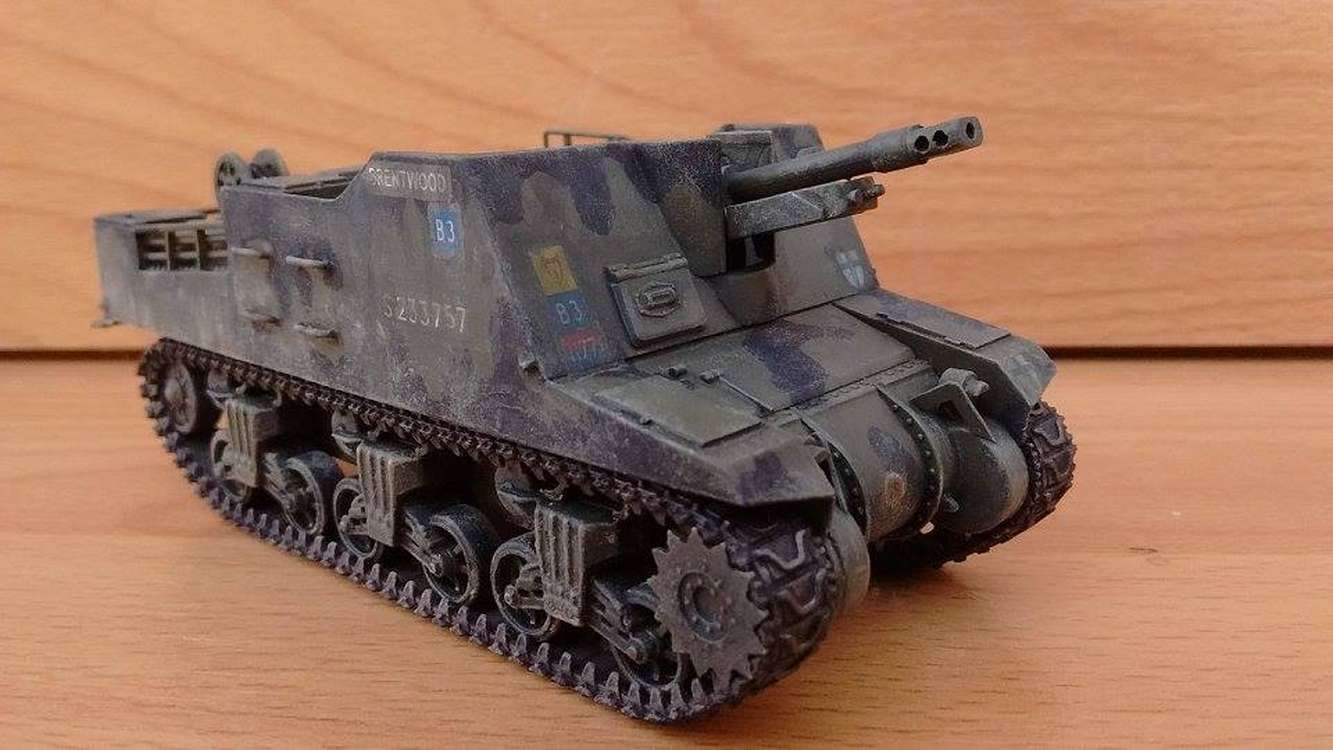
- Unfortunately, the figures included in the ESCI/Italeri 25 pd gun dressed in shorts and some are bare top. They had to be heavily modified to fit into
the vehicle.
- I like building Commonwealth vehicles because of such elaborate markings they have. This one especially. I was fortunate enough to get a hold of a sheet
of Bison decal (out of print) from my fellow model maker Mark Delidula.
- I think the result is pretty good.
Albert Chen


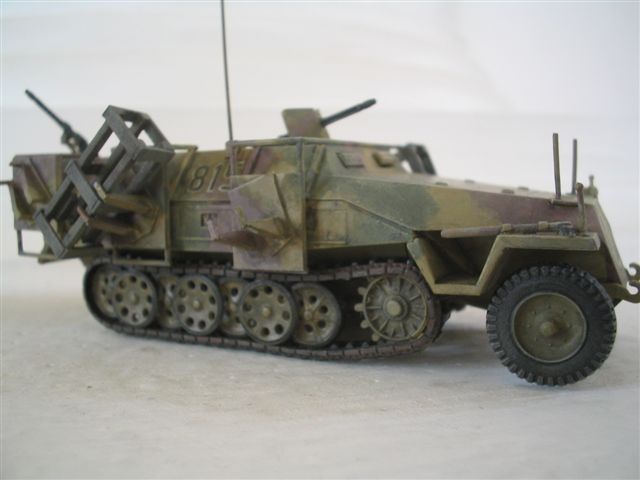
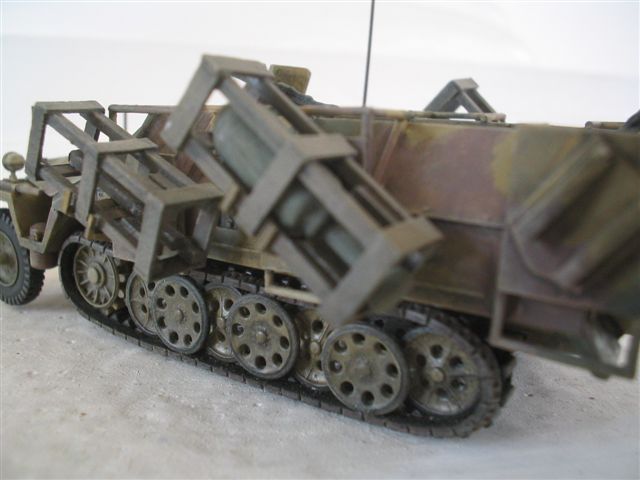


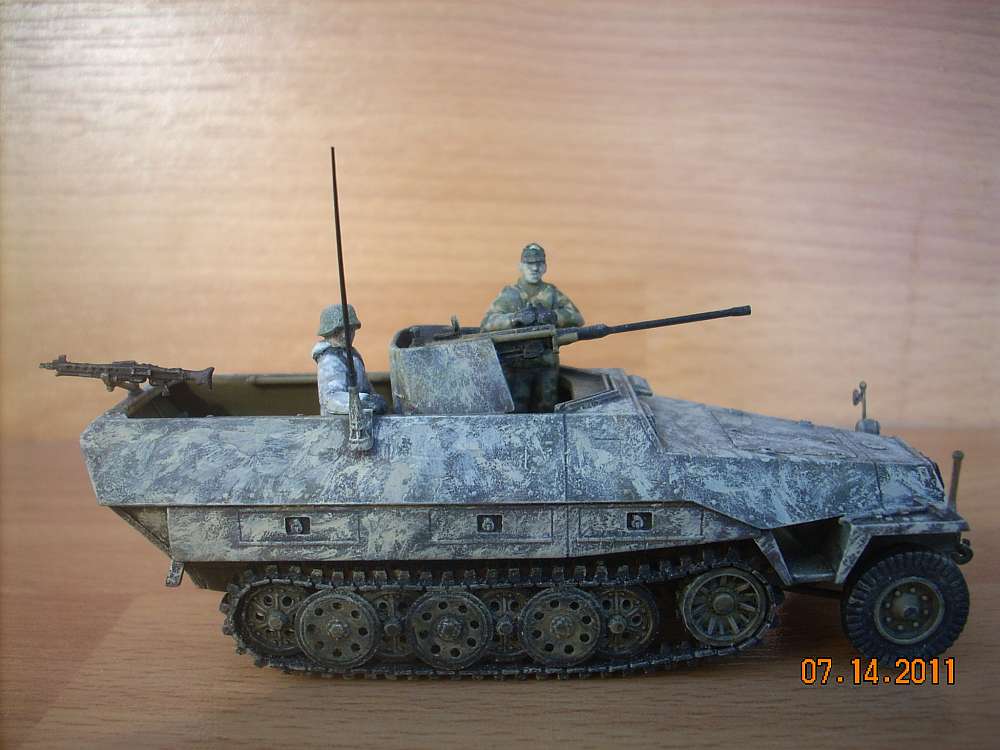

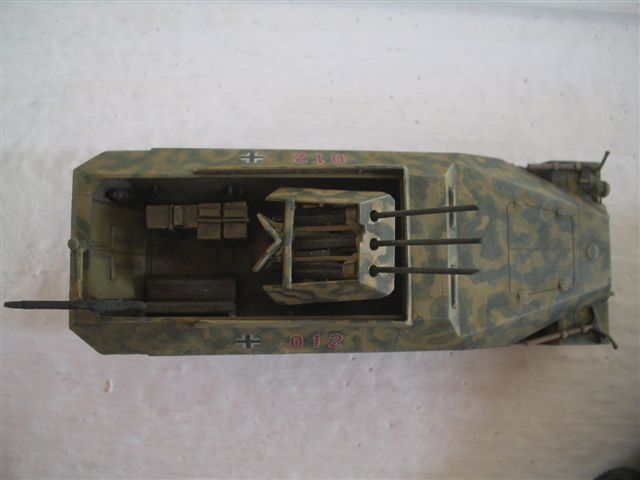
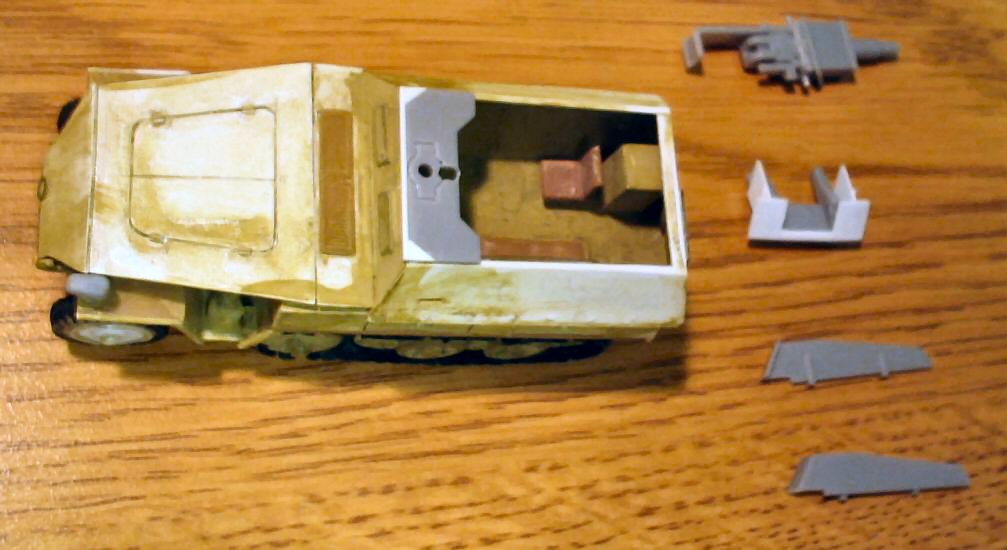
This is actually my first Dragon halftrack model. I think it is definitely more detailed than the Hasegawa model, but somewhat 'over-engineered'. I modified the seats by cutting them in halves and added a ammo box (no ammo).
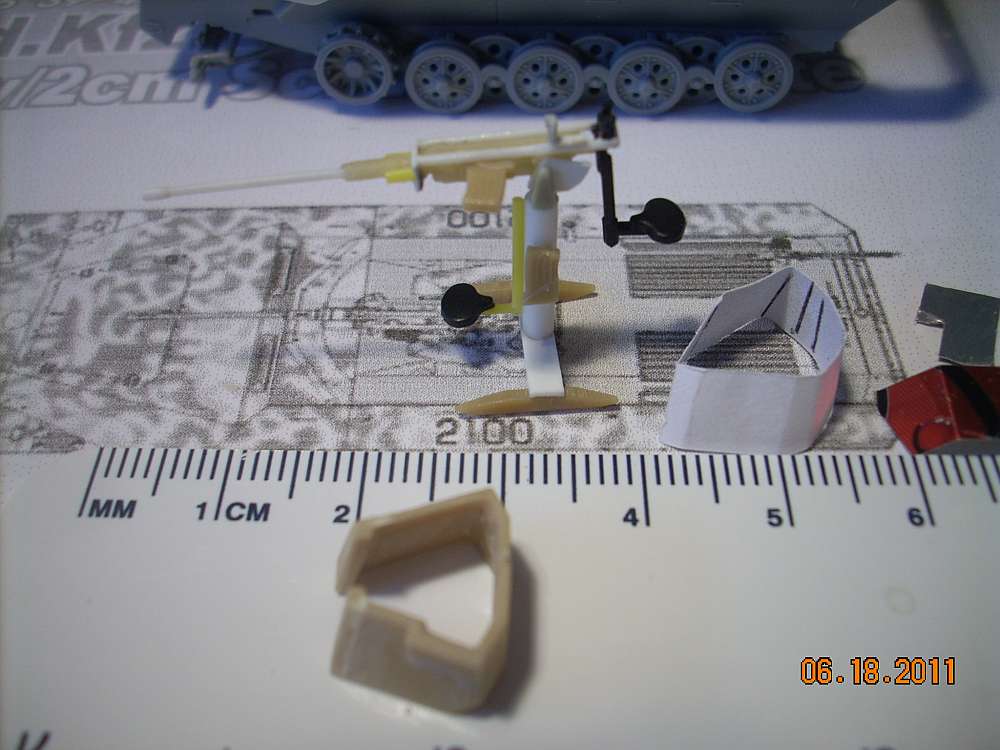
The gun with the small turret was scratch-built. I started with a resin copy of the piece from a Roden SdKfz 234/1. Using the pictures of the Dragon 1/35 model as guide, I used pieces from my spare box and build around the gun. I shrunk down a copy of the 1/35 PE of the shield and attempted to shape it from a soda can, but failed. The aluminum fell apart when I tried to bend it. Finally, I used the tail fender of the Hasegawa M3 Lee to piece together a rather thick shield.
It had to be thick so that the ends would have sufficient surface for a drop of glue and also stiff enough to handle. After it was shaped, I thinned down the top to make it look like sheet metal.
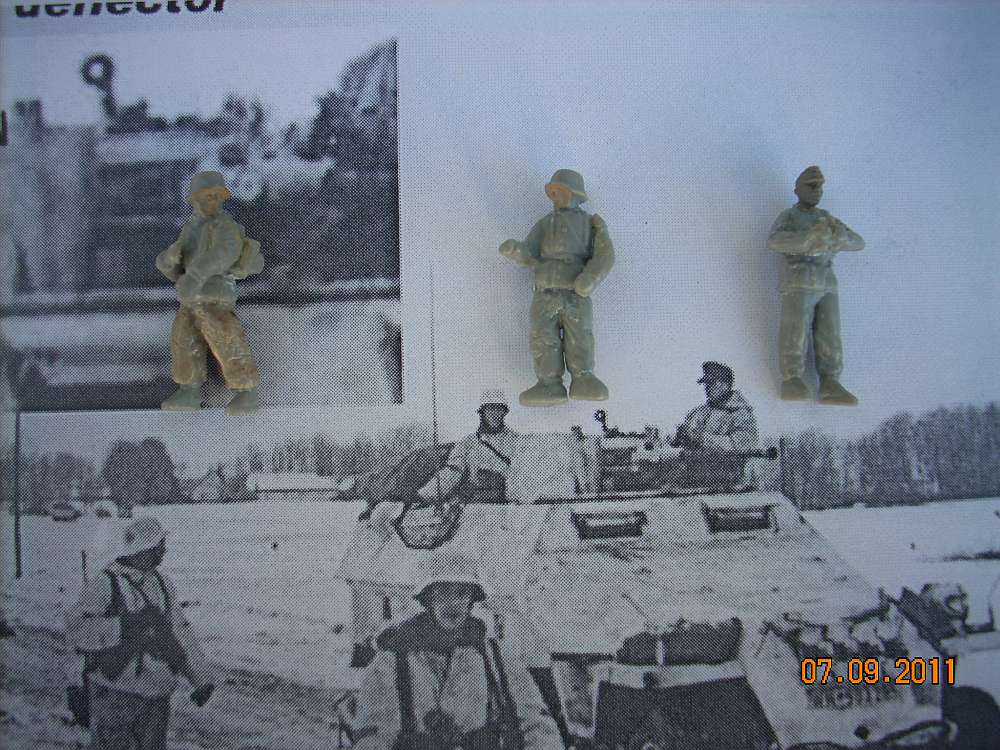
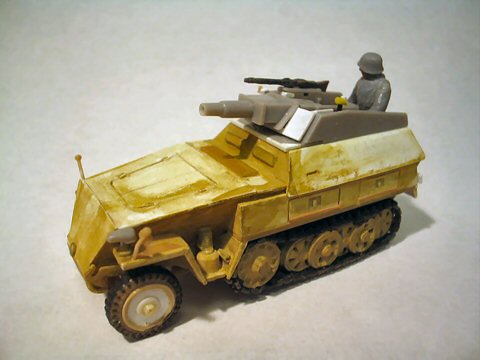
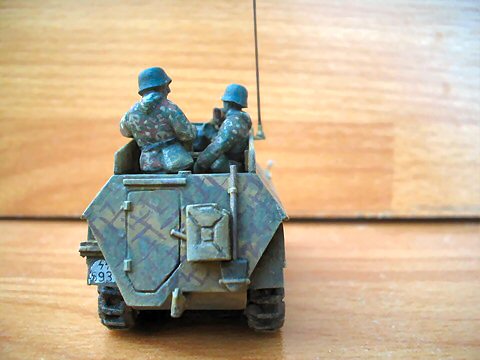
I modified three figures to match the picture I found on the web. They were the classic ESCI smoke grenade unit in winter uniform. -- Albert.


The Sd Kfz 250/8 is based on the old ESCI Sd Kfz 250 Alte model. Not too many original parts were used. A Hasegawa 'Stummel' gun was shortened to make it fit into the smaller vehicle's interior. The figures are modified ESCI Nebelwerfer crew.


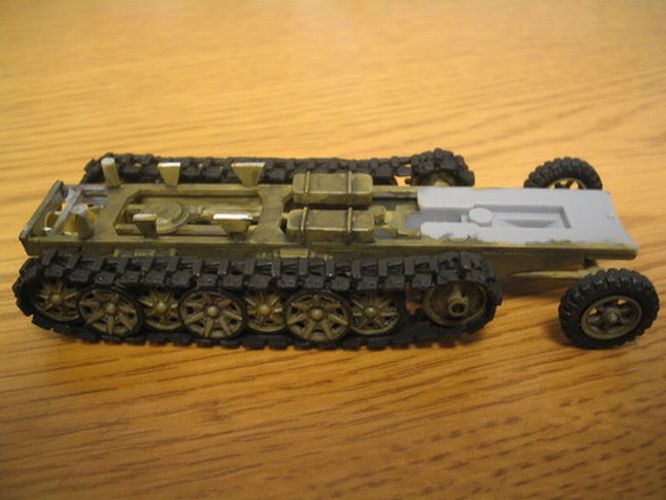


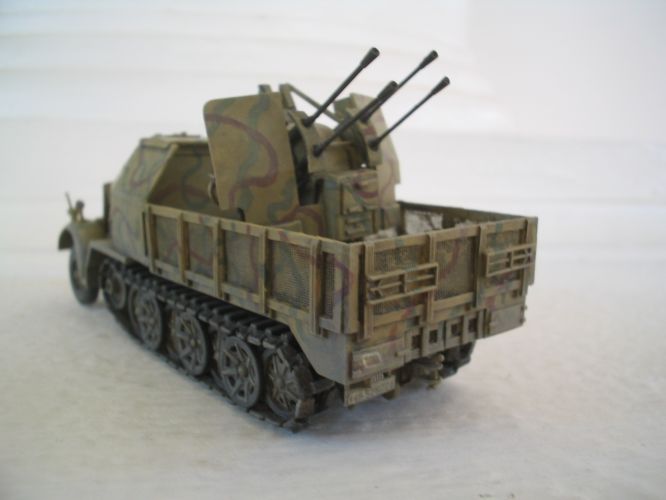


The vehicle is based on the Hasegawa/Revell Sd Kfz 7 with the quad AA.


Comments by Albert
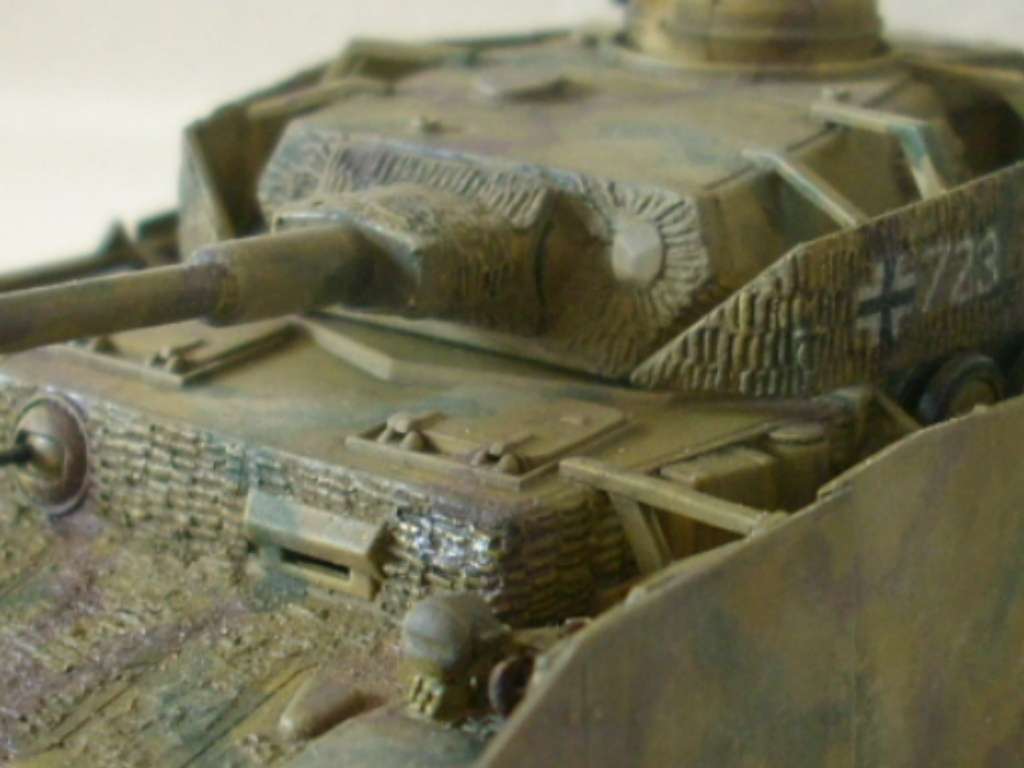
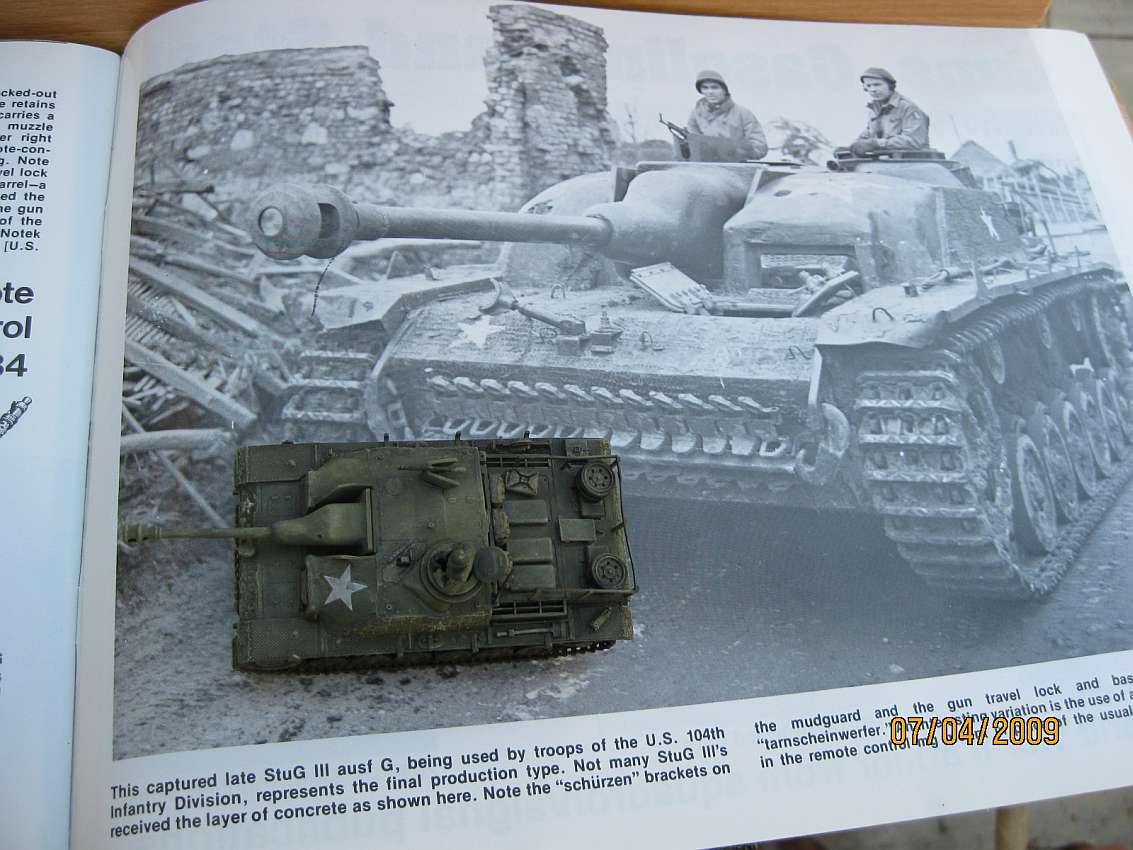
Captured 'Stug' III [Beutepanzer] - I used epoxy putty to make the Zimmerit coating with a homemade stamp. Then the concrete armor was made from hard plastic putty with a lot of solvent. Everything else is pretty much out of the box. This is an excellent model by Revell.
Note: To become a valid e-mail address, replace in email address (at) with @
 E-mail to HenkofHolland