
Pascal Hut
Presentation of diorama's built by Pascal Hut, from the Netherlands
Comments from Pascal Hut.


|


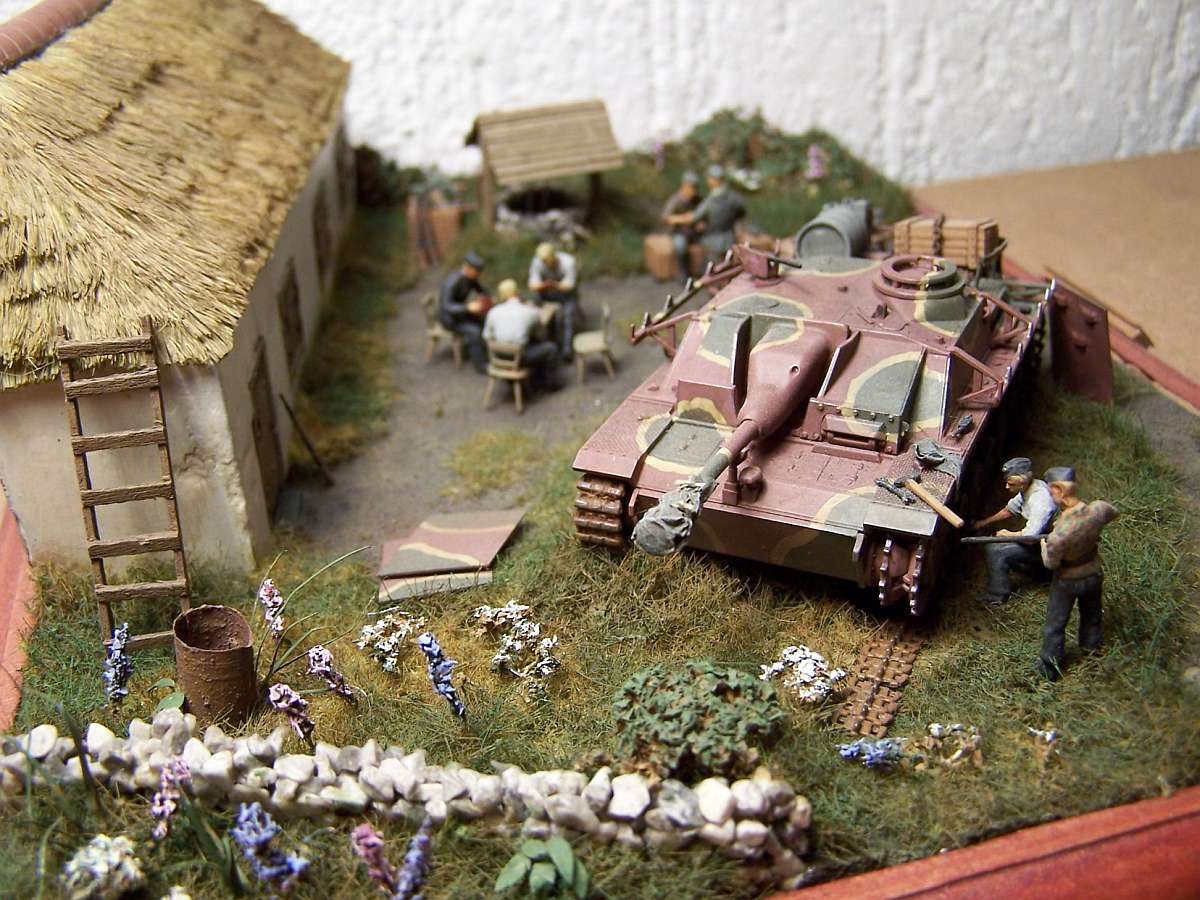
This dio was sort of an accident, I started to build a house with a thatched roof and one thing led to another and it ended-up being the most
complex dio I made so far (actually the first real dio). The stug was originally intended as a base for a sIG 33 assault gun, but I needed a vehicle
for the house.
The stone wall and well were build stone by stone using white glue. The camouflage pattern on the stug is probably historically not correct but I
like the idea of it.
Scratchbuild details where added like stowage rack and skirts to the stug, jerrycan handles, bread (miliputty), bucket, etc.


The soldier has lost his way even though they told him it was easy to find (the signpost broken of). The "peanuts" revers to the base which is
made from the lid of a peanut butter jar.
The vignette was built as an experiment with snow and tree stumps, the snow is made from plaster and the stumps from balsawood. Both techniques
come from a terrain modeling book by Richard Windrow. They both turned out pretty nicely.
As can be seen figure painting is not my strong point. I did try to improve the "cold factor" of the vignette by adding a scarf around the
figures head.
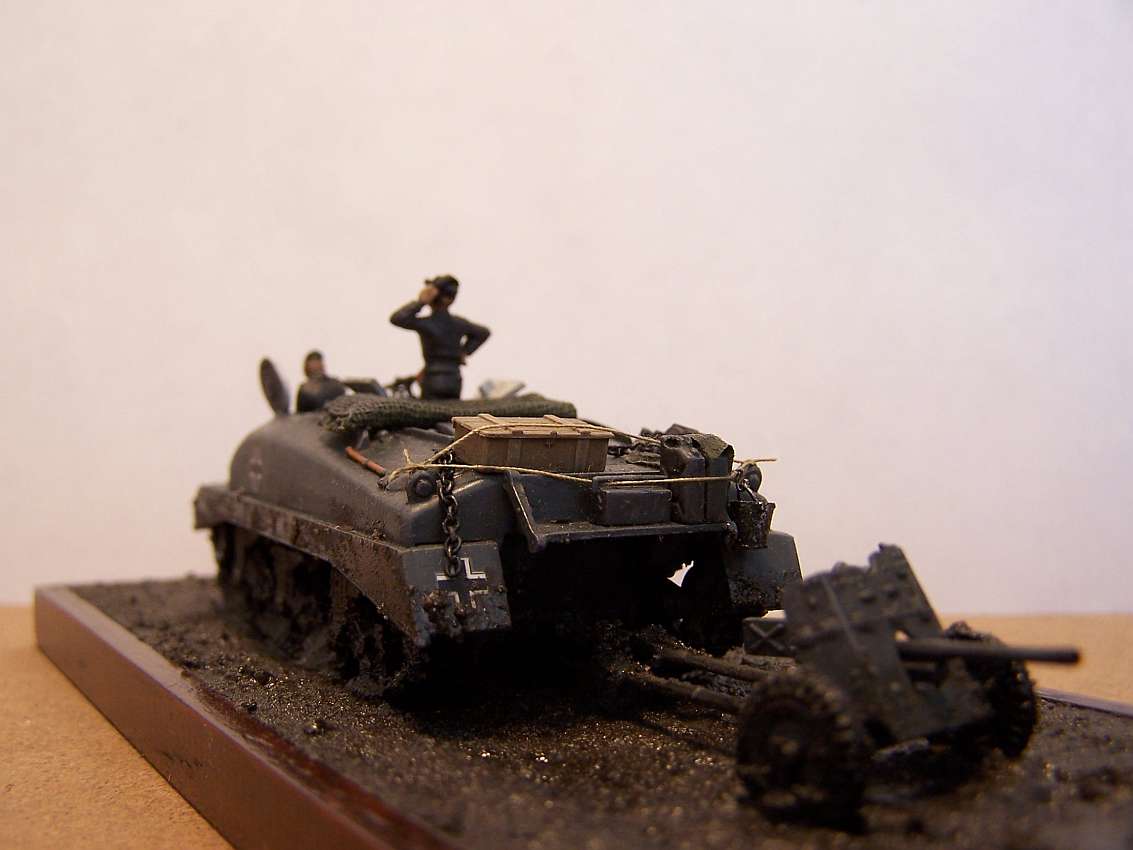


A quick build with a leftover Sherman hull. Not a very good build, it could have used a lot more detailing but it was meant as a quick experiment in mud.


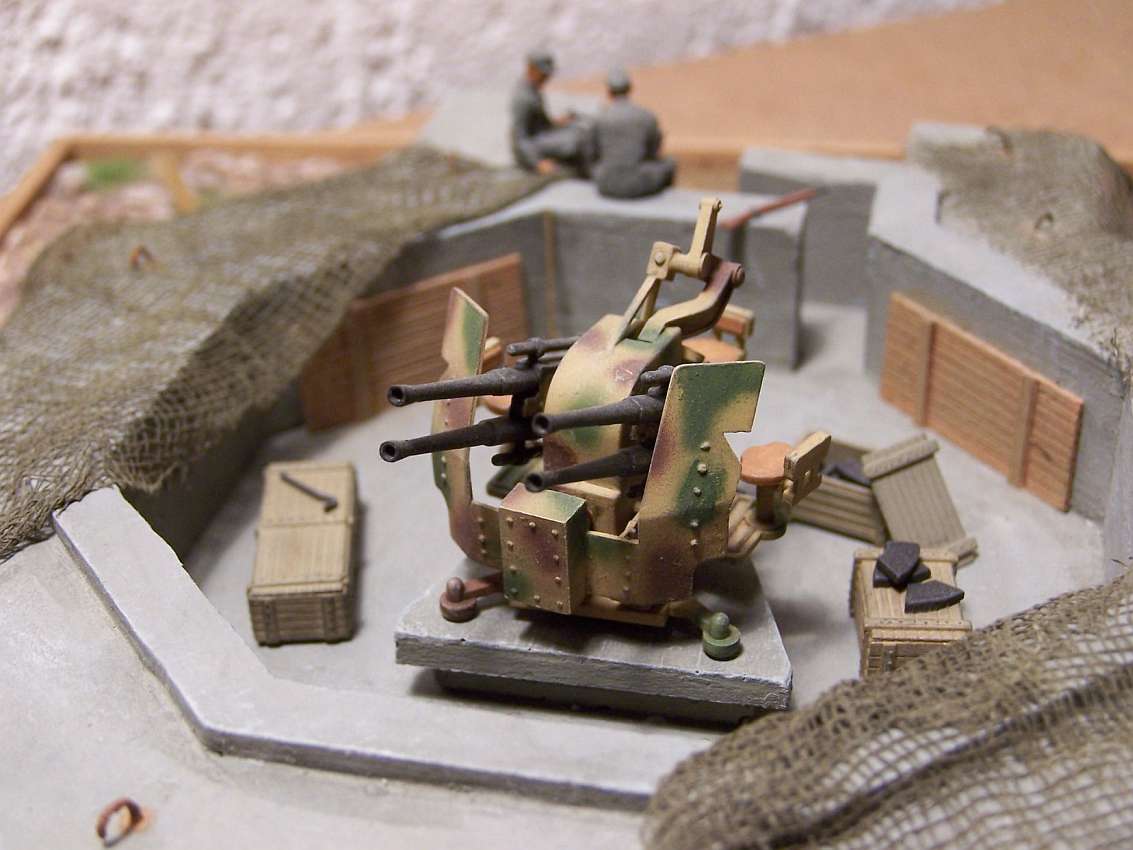


The position was cast in 5 piece from plaster and based on dimension from an article on flak field positions on missing linx. What wasn't clear to me at the time was that normally earth is stacked up against the outer wall, hence this detail is missing. I used a miliputty mold from an original to reproduce the spare cartridges with molten plastic sprue. (This technique still requires some perfecting)


A textbook machine gun position as described in the Osprey fortress series book about German field fortifications. I was very happy with how the tree trunk came out.


I got the idea from a picture I found on Alan Hamby's "Tiger I information centre" http://www.alanhamby.com/tiger.html
This was a very enjoyable project involving plaster casting and scratchbuilding. I used both types of turrets as if the second tower was built later
as an extension of the original shooting range.
The figures came out pretty nice this time.
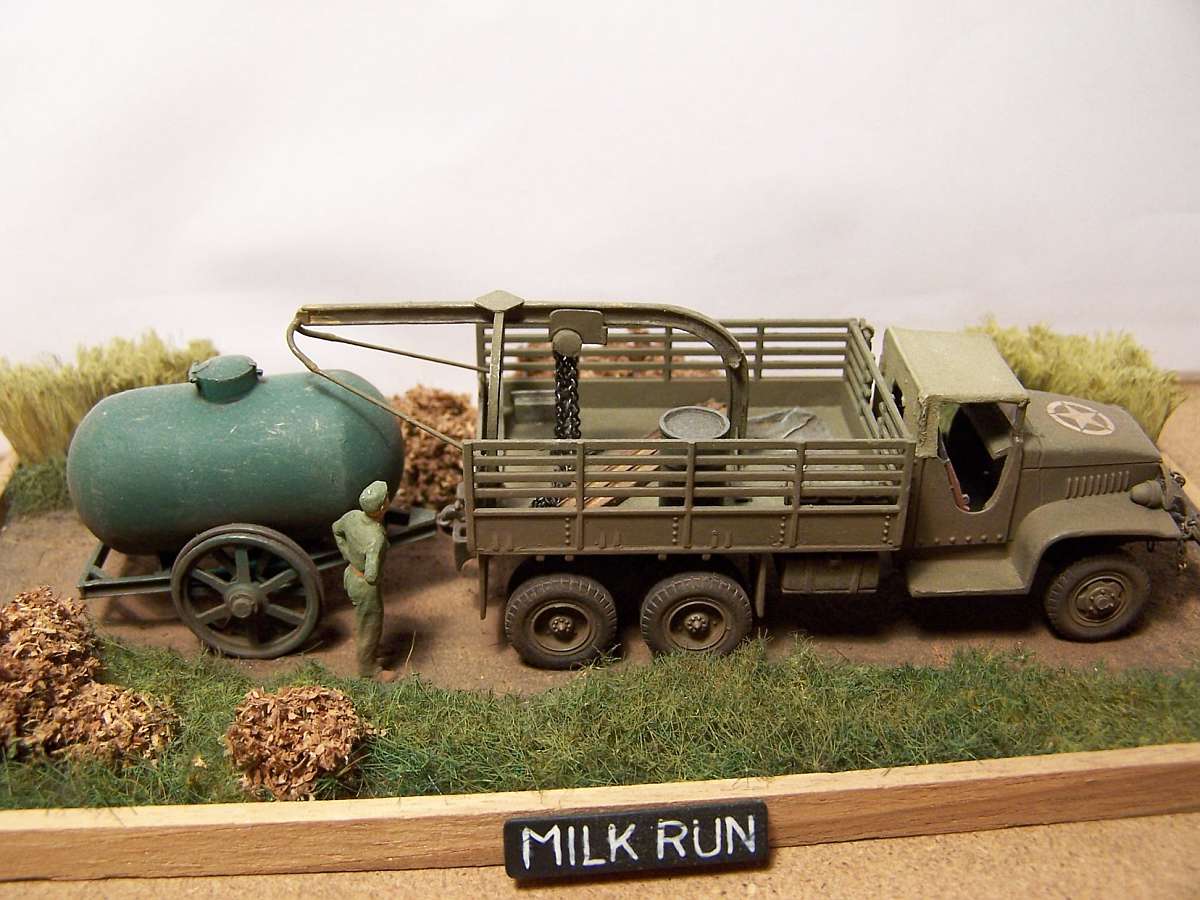


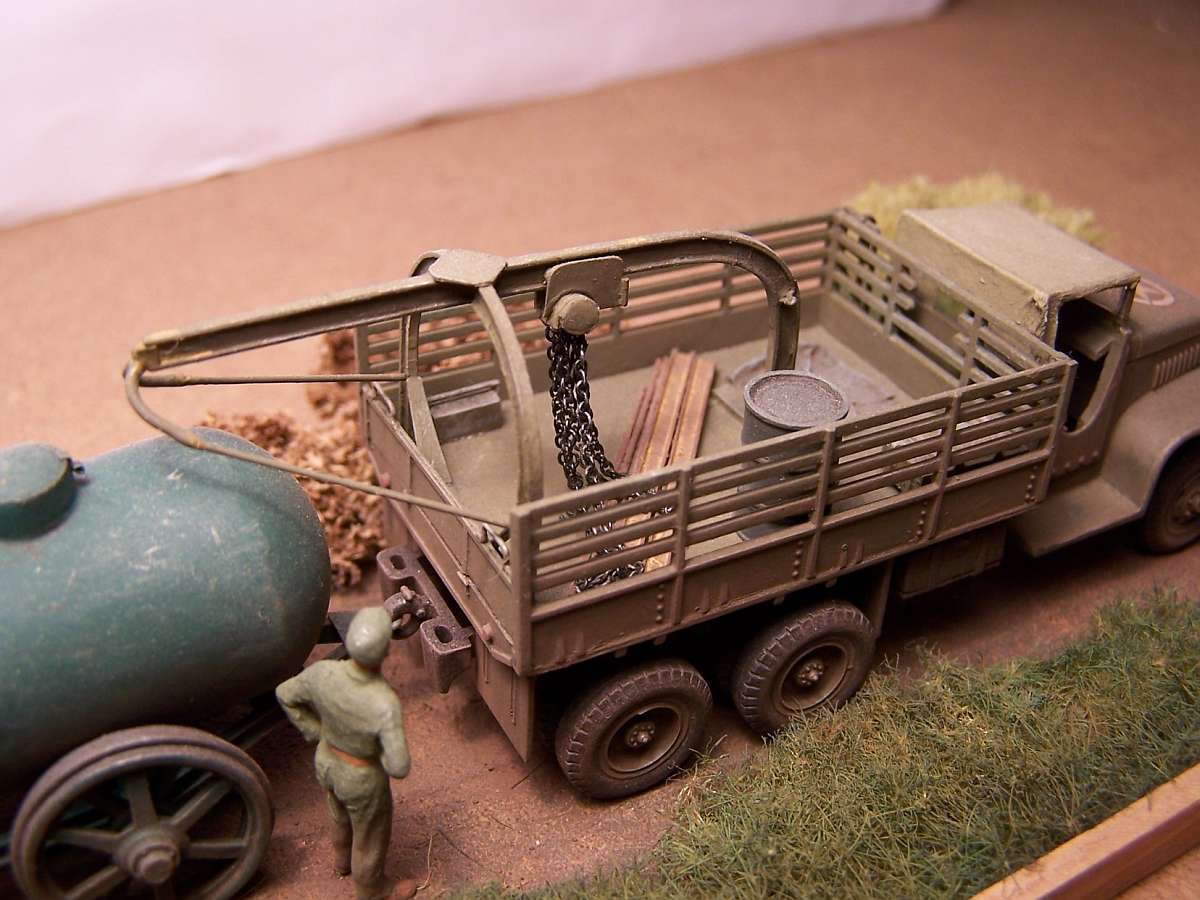

This was my first attempt at scratchbuilding, I found some drawings of the wrecker on internet and decided to rebuild a truck I had already build. The milk car is completely scratchbuild. For a first try I think it came out quite good. The title comes from "milk run" being an easy task/mission. Again figures are not my strong point.
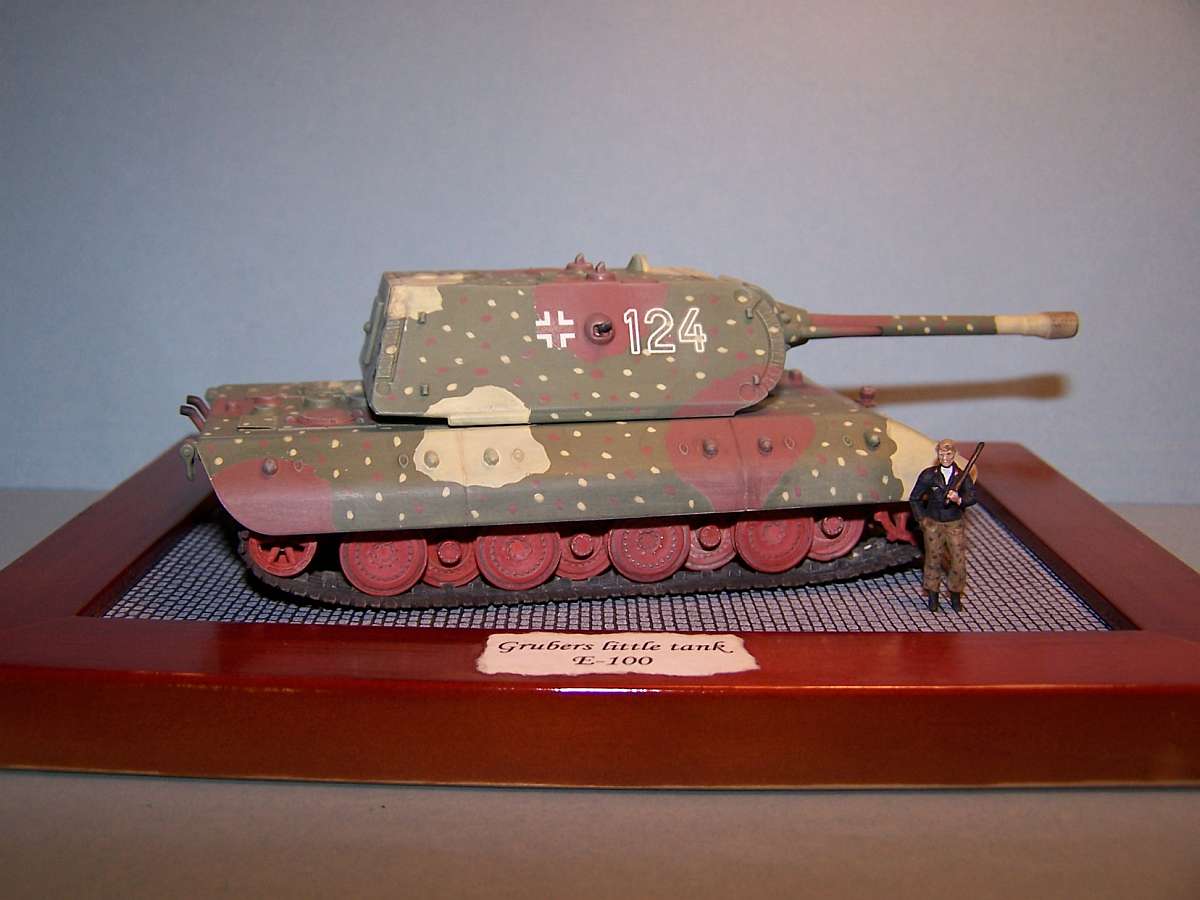

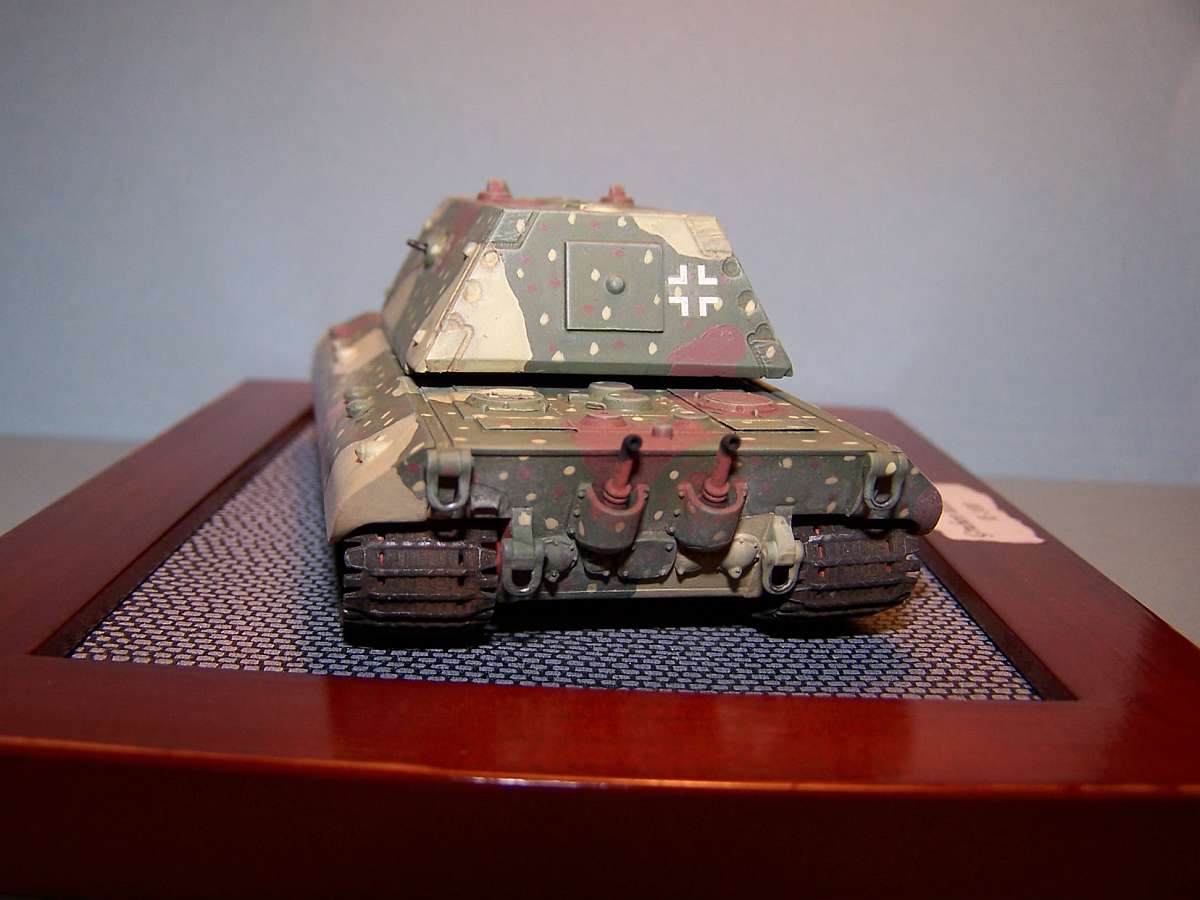
For the ones that don't know the TV-series 'Alo 'alo, the title refers to a small armored car of a character named Gruber, to which he always
refers as "my little tank". (It's a bit farfetched)
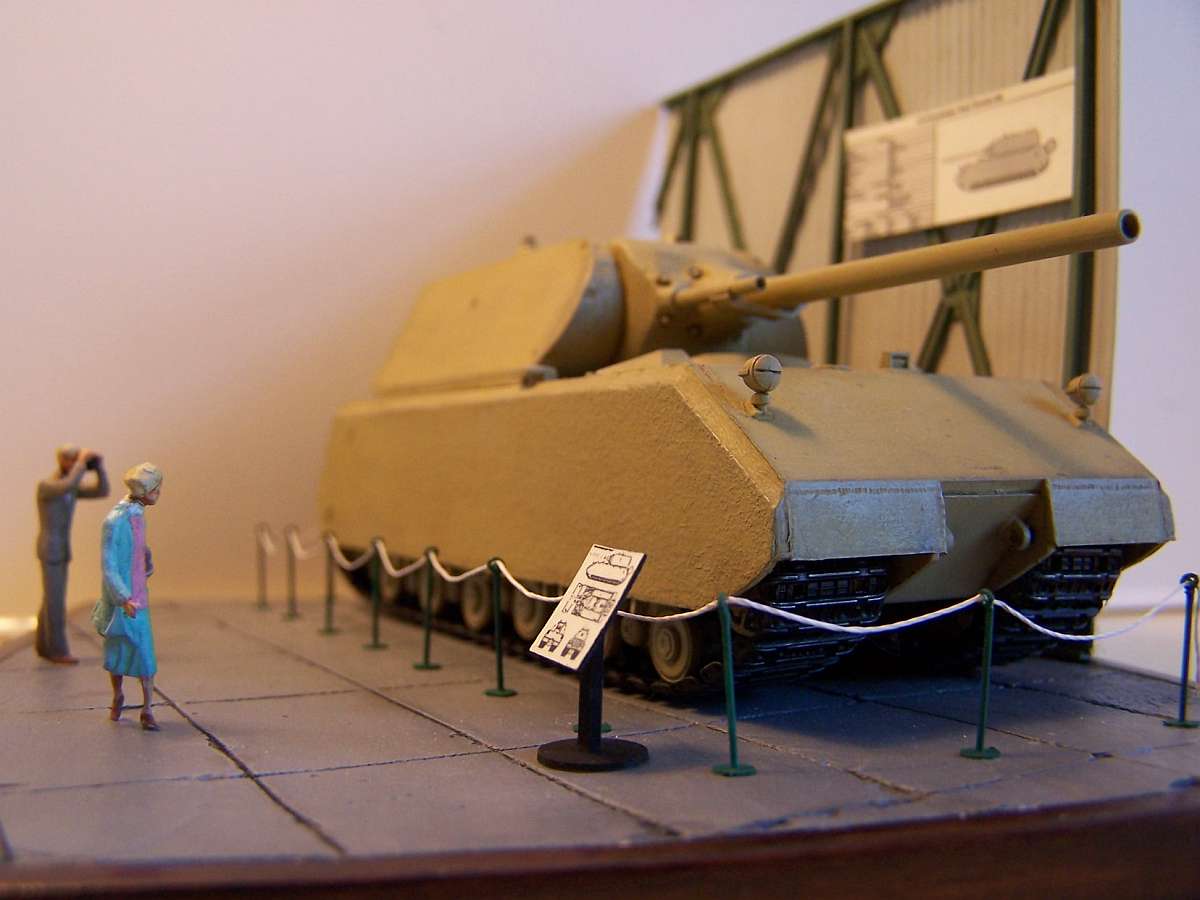
It was a small project in between and it turned out to be a rather boring vignette. In the future I may take this apart and re-used the
E-100 in a different setting.


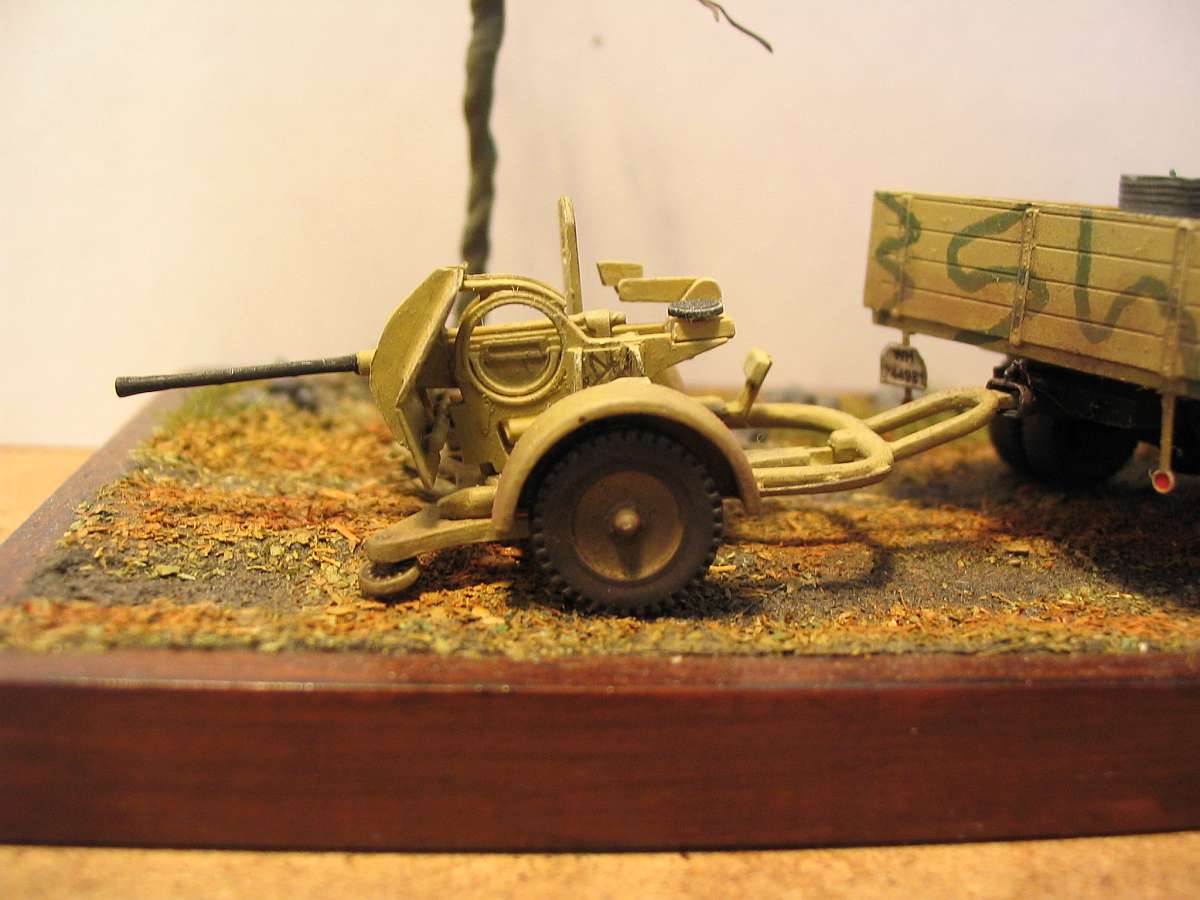
Added some scratched parts (Left part gunshield, paint bucket and brush). The big rock was plaster cast from a latex mold I made from a piece of tree bark. The mud on the guncarriage was made from pastel chalk in turpentine, which came out fairly decent.


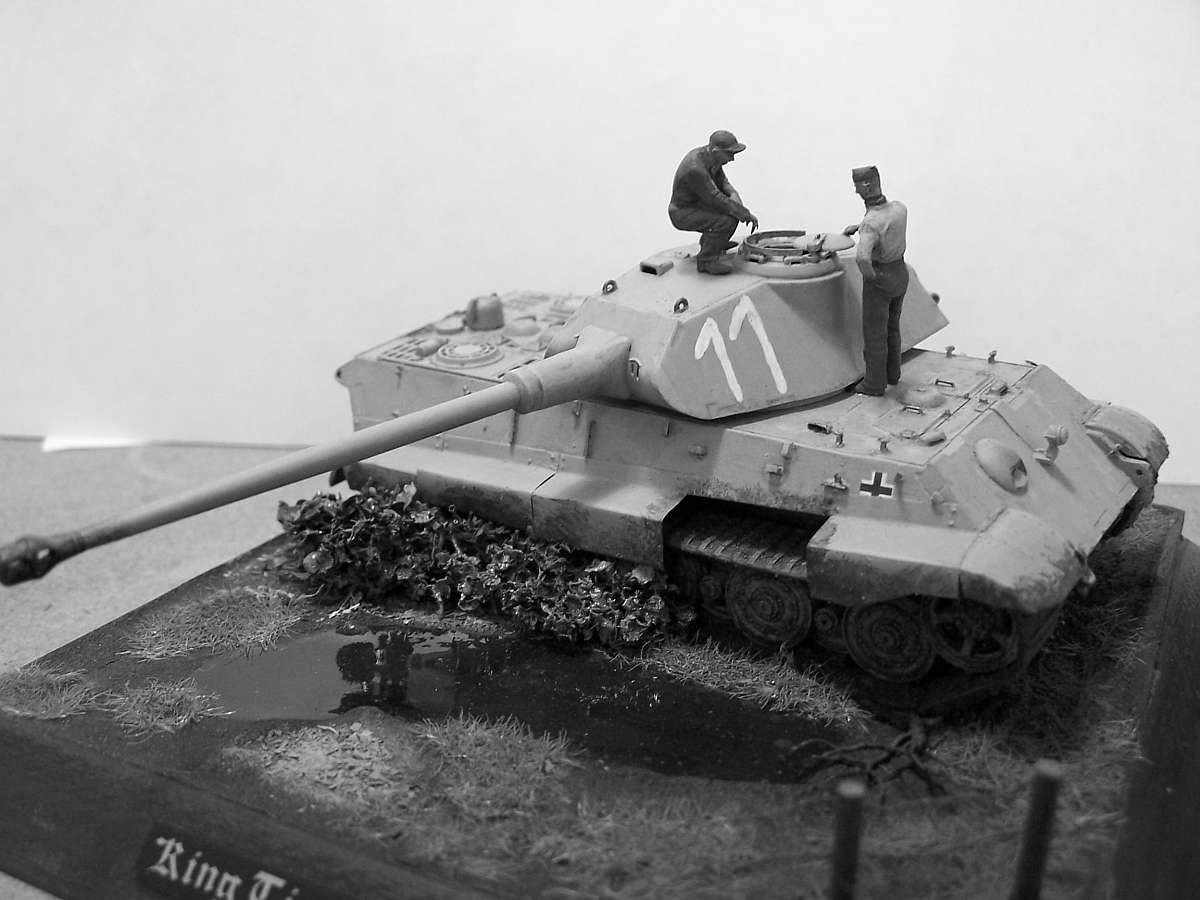
I found an interesting picture on internet and decided to do my first build based on a specific photo. I stripped almost al small details from the
hull and added them from scratch including e.g. the cap for the snorkeling device on the rear deck and the old style exhausts.
I also made a small experiment with water, which was created with several layers of clear lacquer. The scene came out pretty good, however based
on the information I had at the time my conclusion was that this must be the third prototype of the king tiger as I could not see any zimmerite
on the vehicle on the picture I had, plus it had the cap for the snorkeling device, hence the erroneous title.
Later on I discovered this was an error as better pictures of the vehicle showed zimmerite and it turned out there is a whole different combat
history attached to this vehicle. (I forgot which unit they fought with). This just shows how tricky it is to base dios on actual photographs,
especially a single photo and the importance of good research.


These MAC kits come together really great. The only thing I scratched was the gun shield; the kit part was overly thick.
This vignette was to experiment with wire trees and autumn leaves. I was quite happy with the result.


Just a simple vignette of the pnzr I with some small modifications to the exhaust and rear deck as described on "on the way". I also added an antenna.
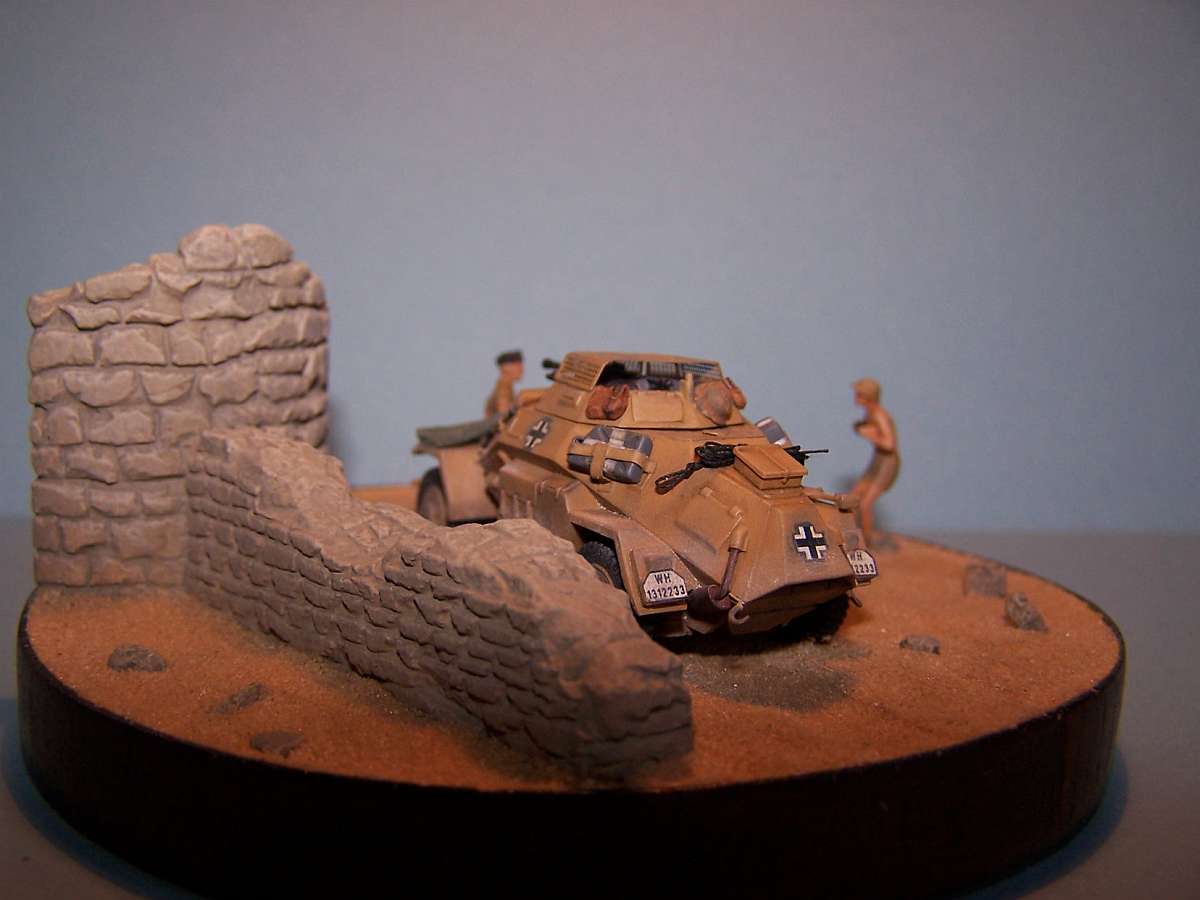


Added some details to the vehicle and replaced the head of the figure leaning on the vehicle. The wall and tower ruin are made from plaster. I really like the kit of the 222 it comes together really great and has separate wheels and hubs, which is very convenient for painting. Overall it came out pretty nice except that the figure taking the photo seems to be standing rather odd.


I know the painting scheme is completely wrong; the scene is an old one with little research. The plans behind the scene were making something
active and try out the salt technique.
The salt technique is not something I personally like, I could not get the salt off properly after painting and this can be seen clearly.
Besides the not so fantastic painting of the vehicle I was quite happy with the corrugated iron roof (made from an aluminium dish) and also with
the shack and the axe with chopped wood. Except for the vehicle and figures the rest is scratched.


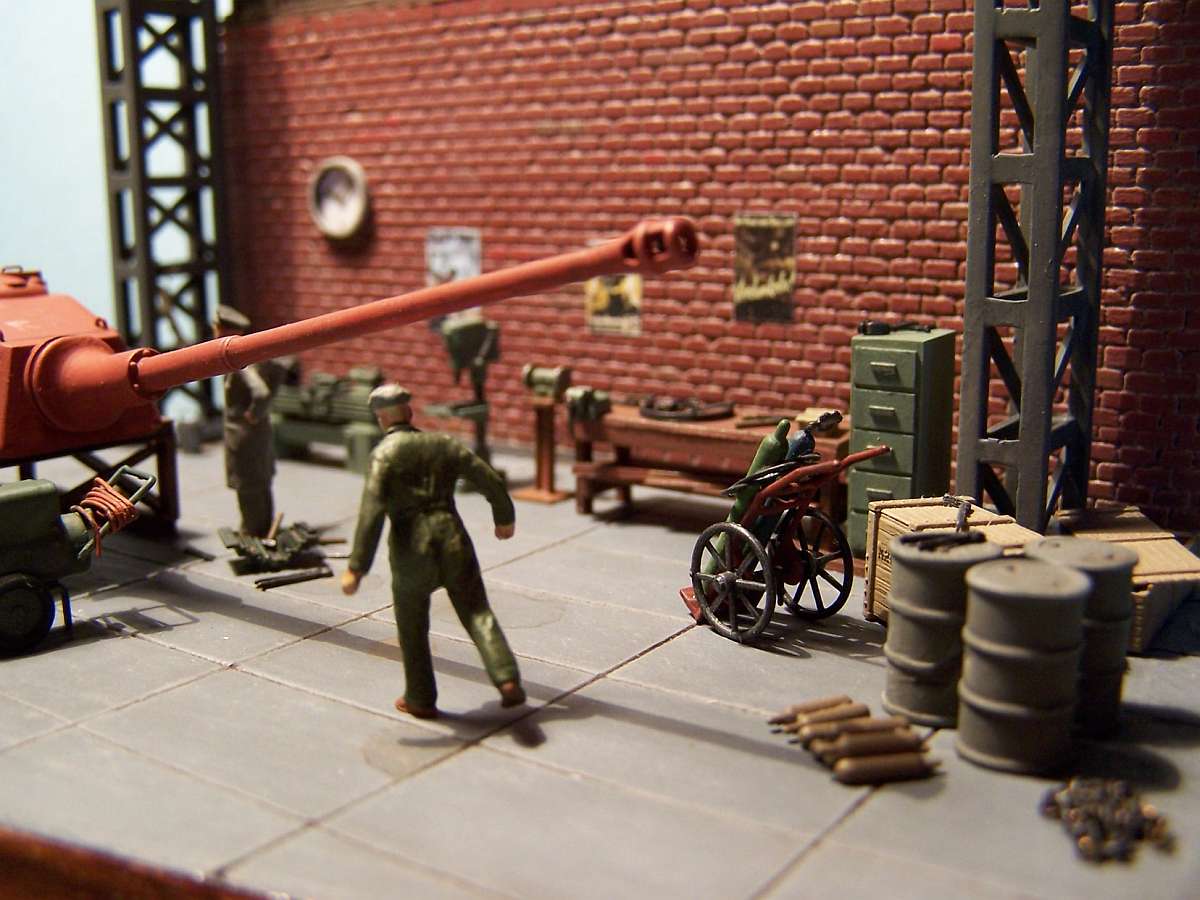


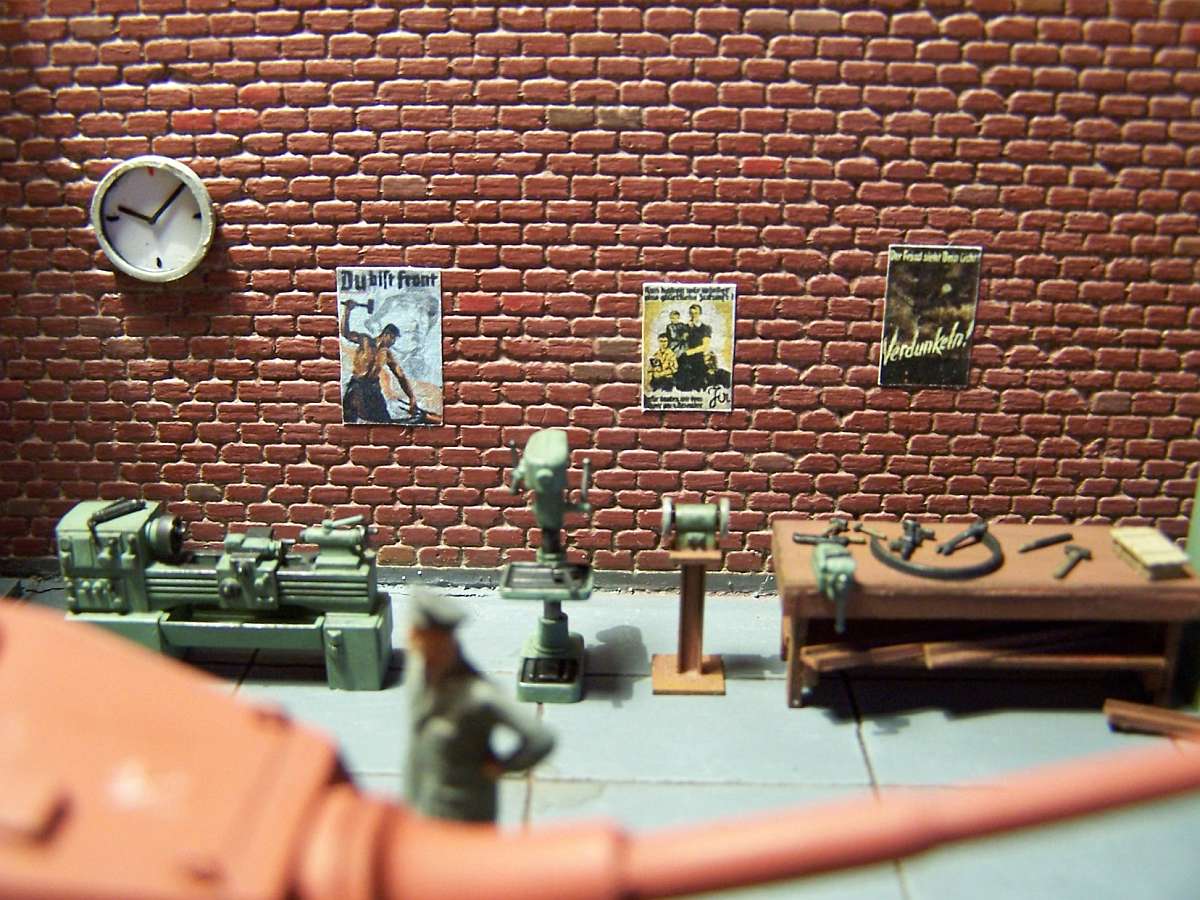
The columns came from an old revell kit of a rocket and launch platform. The rest of the scene is scratch build. I like the idea of having the black-out poster and the windows painted black. The scene came out pretty good (if I say so myself) except that it is a bit vague what the person looking at the turret is actually looking at.

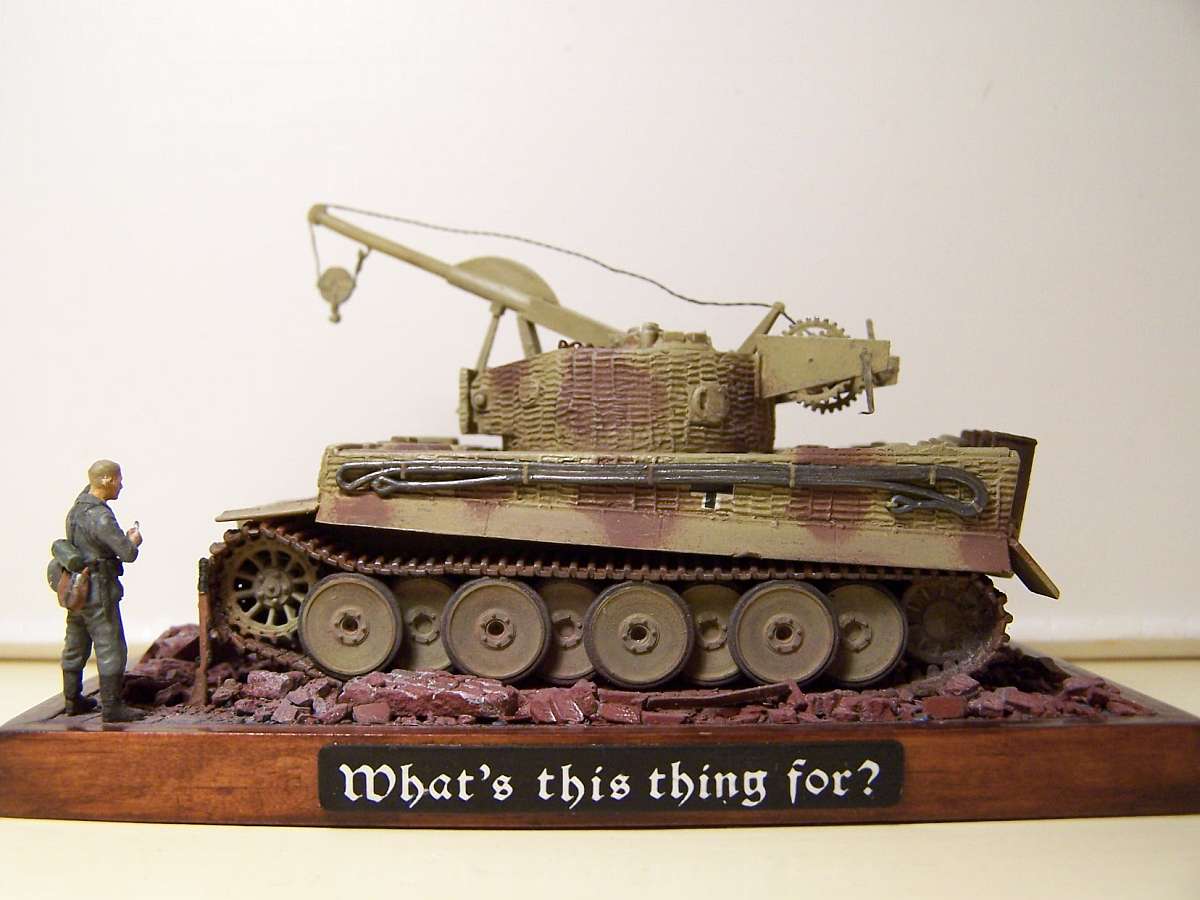

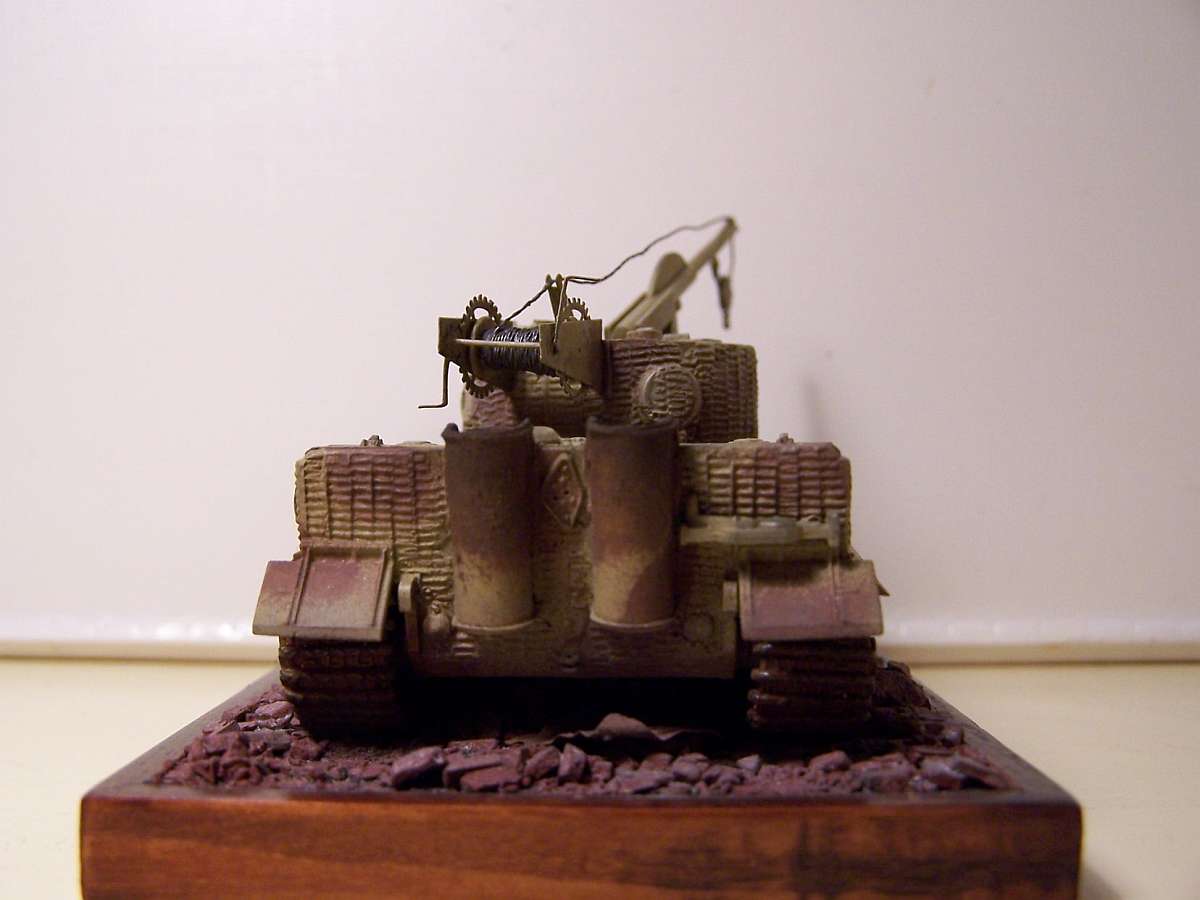
I bought the planet model bergetiger as my first resin kit. Personally I don't like resin, but some subjects are hard to get in 1/72 plastic. (This was pre-dragon). It really was disappointing for me, the only parts I ended up using where the turret and the PE, even the boom had to be rebuilt. Both tiger I's where left over from the kannonierschule dio. This was my first attempt at zimmerite with a homemade tool from the side of a cd case. The vehicle could have done with some more scratch details and a better paint job. My airbrushing abilities and equipment both need desperate upgrading, but practice makes perfect. De rubble was made in the usual manner from plaster casting.


My first (and only) encounter with a die cast hull, I found it something not worth repeating. The tracks of the sturmtiger were to short and required
a piece of revell tiger I track to complete it. The crane was rebuilt and the fenders and exhausts replaced. I've also added windows to the truck.
The statue base is a left over sprocket from the revel 1/35 panther.
The sturmtiger rockets are cast from plaster as is the ruin, separate bricks and the town square. Although the street was meant to look cleaned
after the battle it looks to clean and the rubble pile is not high enough.


I very much liked the idea of showing several types of camouflage used by the Germans in one setting. It took a while to find the right panzer that could have worn them all. As it turns out there was a particular ausf. C that was used right up to the end of the war in Normandy. Ive read some negative things about the Mirage kit, but I must say I like it very much. It comes together great. It was rather difficult to show the difference between spring and summer, but I like the way autumn came out.


Small vignette based on the standard mortar position as described in the Osprey fortress series book "German field fortifications". It came out fairly nice except that it looks rather cramped while the dimensions are according to description.
Note: To become a valid e-mail address, replace in email address (at) with @
|
|
 E-mail to HenkofHolland